
omegablackmage
Certified Lion Rider
Hello, I'm known as Omegablackmage on these forums and I am a dedicated Game and Watch main, since melee even. I started writing this guide shortly after the Japanese release of the game (Early February 2008) and I hope to outline the changes that have been made to Game and Watch since melee and how one might go about playing him in brawl effectively. I'm a part of the mages who have hosted the famous Cataclysm tournaments in the Northeast that were attended from all around the nation. Personally I have placed very well in brawl tournaments using only game and watch so I hope that you will find my information here to be useful and that I am qualified enough to write this guide.
Table Of Contents:
☼ Pros:
☼ Cons:
☼ Advanced Techniques
* Bucket Braking - if when you get hit by a strong attack, immediately start doing a neutral air a soon as possible. As soon as you are done with the nair, do a down b which cancels all of your momentum. This will help you live 10-15 percent longer for short kill paths and even up to 30-40 percent longer going all the way across the stage.
☼ Game and Watch Mechanics (and changes from melee)
* Shield is significantly improved from melee, you will find that you get shield poked about the same as any other character would
* Rolling and sidestepping both have more invincibility and less lag. Sidestepping can now be usefull without being punished and rolling is good for when you use it sporadically.
* Weight seems to be buffed a slight bit. Gw would be killed very early in melee, and even though he's the third lightest character still, the weights in this game seem to be much more balanced.
* Grab range and speed seem to be mostly unchanged. The range falls in the average range for non grapple grabbers, and speed is also pretty average. His pummel is very slow but hits for 3%.
* Has a pretty good fox trot for those who would incorporate this into their game, watch out for tripping though.
* Game and Watch's glide toss is very good but also very hard to pull off. To use this, in the beginning of your roll, throw an item using the cstick and gw will slide very far across the ground while throwing.
* Airwalking is possible for game and watch with his dair. To do this, run off the stage and press C down and then di back to the stage. If done right you'll be able to use your dair right next to the stage w/o needing to jump.
* Key stomping is possible by pressing down and then c down on a platform. this lets you hop up slightly as you dair with little lag. You can do this repeatedly with little lag and can hit a lot of people below you.
* Hugging is pretty easy to do with game and watch, simply run off the edge and then di towards the stage to grab it.
☼ B Moves Analysis-
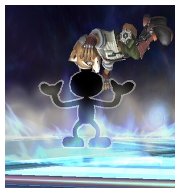
Up B : The Firemen - (6%)
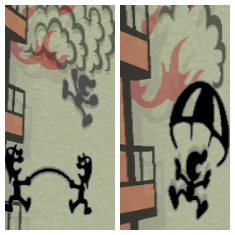
☼ 8 startup (he jumps on 9)
☼ 5 frames of complete invincibility (frames 9 - 13)
GW gains a lot of height by jumping off a trampoline and then deploys a parachute at the peak of his jump which slows his fall and allows him to manipulate his trajectory on the way down.
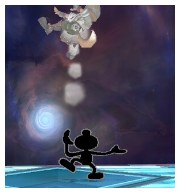
Side B : The Hammers

☼ hits on frame 16 (all hammers)
☼ hitbox lasts 16-22
☼ 25 cooldown
☼ 47 total
☼ Move can be b-sticked with good results
GW pulls a hammer out which is a random number between 1 and 9 that have varying effects. The random generator for these hammers follows these rules
1 - 12% to self, 2% to opponent with no knockback
2 - 4%, little knockback to opponent
3 - 6%, knock opponent behing gw
4 - 8%, hit opponent away
5 - 12% total (4 hits, 3% each), electric stun
6 - 12%, fire hit that semi spikes
7 - 14%, food spawns next to gw that heals 4%
8 - 9%, opponent gets encased in ice
9 - 32%, opponent almost always gets instant k-o'd and gw taunts in the middle
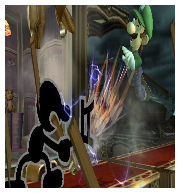
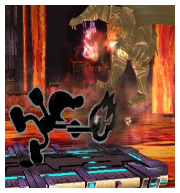
Neutral B : The Frying pan - (pan 9%, projectiles 4% each)
GW pulls out a frying pan and begins to flip out fish, sausage, and steak. The projectiles will fly upward and then downward with varying arcs.
Down B : The Bucket
Collecting:
☼ begins collecting on frame 6
☼ minimum total time out without charge collecting: 50
☼ 13 cooldown (13 frames where the bucket is not out)
☼ after a charge is collected (when a bar fills up in the bucket, not the collecting animation) it takes 72 frames to shield
Releasing:
☼ Closest - hits on frame 2
☼ Midway - hits on frame 8
☼ Tip of the spill - hits on frame 14
GW pulls out a bucket that can catch any energy based projectile. Upon catching a projectile, GW gains invincibility frames and can catch any projectiles in succession. After three projectiles have been caught, GW can empty the contents of the bucket in front of him with a powerful hitbox.
Mr. Escalator revised the chart that categorizes the effects of the down b (ko's are referenced from the middle of final d)
18% damage, won't KO until well over 100
Charizard - fire breath
Ice Climber - breath
Bowser - fire breath
Ness - pk thunder tail
Ness - pk fire pillar
Lucas - pk thunder tail
Fox - back throw
Fox - forward throw
Fox - blaster (long range)
Falco - back throw
Falco - forward throw
25% damage, KOs around 65% with no DI
Lucas - PK Fire
Fox - blaster (short range)
Falco - blaster
Samus - uncharged shots
Peach - counter (pan foods)
DDD - beam attack from waddle
33% damage
Ness - PK Fire
Yoshi - Down B Stars
ZSS - uncharged neutral b
Kirby - frying pan
42% damage, KOs around 20% with no DI
Robot - optic blast
Mario - fireballs
Pit - arrows
Dedede - Up B stars
Lucas - pk fire explosion
Kirby - final cutter (short range)
44% damage
Lucario - uncharged energy ball
50% damage, KOs at 0% with no DI
Lucario - forward b (max range of move)
Pikachu - neutral B lightning (after the projectile hits the ground)
Wolf - blaster
Luigi - fireball
Kirby - final cutter (long range)
ZSS - charged neutral B
60% damage, KOs at 0% even with DI
Pikachu - down B lightning (can max in one go if you catch under pikachu on a platform)
Pikachu - neutral b (ball form)
Zelda - Din's Fire
Lucas - PK Freeze
Lucas - PK Thunder
Ness - PK Flash
Ness - PK Thunder
Lucario - fully charged energy balls
Lucario - forward b (closest range possible)
Samus - fully charged shots
ZSS - downsmash (any charge)
Rob - optic blast (charged)
Pit - arrows (charged)
See the resources section for better explanation on how the bucket works.
☼ A Moves Analysis-
Jab : The Greenhouse - (3% for initial jab, 1% for subsequent)
Single jab:
☼ hits on frame 4
☼ hitbox lasts 4-6
☼ 9 cooldown
☼ 15 total
☼ 1 frame of shieldstun
Combo hits:
☼ 3 startup (so it would hit on frame 12)
☼ 0 cooldown
GW pulls out a pump in front of him that has a puff of air as a hitbox. This can be done in rapid succession to hold your opponent up.
Here's a list of projectiles that gw can cancel out with his jab. (courtesy of Neb)
· Mario & Luigi: Fireball
· Link: Arrows (not fully charged), Boomerang
· Samus: Energy Ball (not fully charged), Missile (only seeker)
· ZSS: Plasma Laser
· Pikachu: Thunderbolt
· Diddy: Peanut (no lag/disintegrates)
· Pit: Arrows
· PT: Ivysaur- Razorleaf
· Snake: Missile (Slows momentum/redirects)
· Peach: Turnips
· Yoshi: Egg Roll
· IC (Ice Climbers): Ice Block (reflects back!)
· D3: Waddle Dee’s
· Ness: PKT
· Wario: Bike/Bike parts
· TL: Same as link
· Olimar: Pikmin
· R.O.B: Gyro (not fully charged)
Forward Tilt : The Chair - (10%)
☼ hits on 10
☼ 35 duration
☼ Between 17-20 cooldown
☼ 4 frames of shieldstun
GW pulls out a chair holding it by the backrest. It extends in front of him with a long lasting hitbox (possibly the longest of of his single hitboxes).
Forward Smash : The Match - (18-25%)
☼ hits on frame 17
☼ 10 cooldown
☼ 42 total
☼ 6 frames of shieldstun
GW pulls out a match by the handle that has a flame atop of it that hits your opponents. The hitbox stays out for a while but is the strongest when first pulled out.
Down Tilt : The Manhole - (6% [9% anti-air])
☼ hits on frame 6
☼ Hitbox begins on frame 6
☼ Hitbox ends on frame 25
☼ 0 cooldown
☼ 2 frames of shieldstun
GW "flips" a panel in front of him that is a manhole cover. This is GW's furthest reaching move (other than oil panic) having had its range greatly extended from melee. This move will push your opponent away a formidable distance away from you when connecting.
· Mario & Luigi: Fireball
· Link: Arrows (not fully charged), Bombs (At a distance), Boomerang
· Samus: Energy Ball (not fully charged), Missile (only seeker)
· ZSS: Plasma Laser/Whip (Sweet-Spot)
· Pikachu: Thunderbolt
· Diddy: Peanuts (No lag/ disintegrates them)
· Pit: Arrows
· PT (Pokemon Trainer): Ivysaur- Razor Leaf, Charizard- Flamethrower
· Snake: Missile (Redirects), D-smash mine (Harmlessly detonates)
· Peach: Turnips
· Yoshi: Egg Roll
· D3: Waddle Dee’s
· Lucario: Aura Sphere
· Ness- PKT
· Wario- Bike parts/Bike
· Olimar: Pikmin (PWNage)
· TL- Same as link
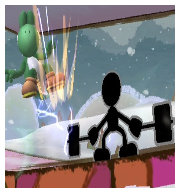
Down Smash : The Hammers - (15-21% tip, 13-18% mid)
☼ hits on frame 15
☼ 10 cooldown
☼ 33 total
☼ 4 frames of shieldstun
GW pulls out two hammers on either side of him and slams them to the ground. This move sends opponents two ways: upwards very fast if you sweetspot it (end of the hammers) or to the sides pretty far if it wasn't sweetspotted.
Up tilt : The Flag - (8%)
☼ hits on 13
☼ 29 duration
☼ Between 3-8 cooldown
☼ 2 frames of shieldstun
GW pulls a flag out above his head and sweeps it above him. Pops your opponent up slightly.
Up smash : The Helmet - (18-25%)
☼ hits on frame 24
☼ 10 cooldown
☼ 38 total
☼ 6 frames of shieldstun
GW has a diving helmet on his head and he rocks his head back and then forward. This will send your opponent upward.
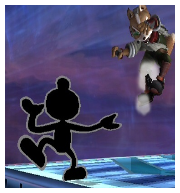
Dash attack : The Headbutt - (11%)
GW puts another helmet on and runs forward with his head in front. GW will slow down as the move proceeds.
Neutral air : The Fishbowl - (first hit is 5%, the next three are 4%, 17% total)
☼ hits on frame 7
☼ 34 duration
☼ 8 frames of midair cooldown
☼ 9 frames of landing lag
☼ 1 frame of shieldstun (Multihit)
GW pulls out a fishbowl above his head that has fish pop out of the top of it in a fountain like path. Each hit stuns and pulls in except for the last hit which sends your opponent upward slightly.
Forward Air : The Box - (16% early frames, 6% late frames)
☼ hits on 10
☼ 44 duration
☼ 22 frames of landing lag
☼ 5 frames of shieldstun
GW pulls out a box-like object (many names for this move are floating around) that hits opponents pretty far in front of gw. This move hits the opponent out and away and the move is strongest when first pulled out and weakens the longer it's out.
Back Air : The Turtle - (5 hits, 3% each, 15% total)
☼ hits on frame 10
☼ Duration: 39 frames
☼ 12 frames of landing lag
☼ 1 frame of shieldstun (Multihit)
GW pulls out a turtle with formidable range behind him. This move multi hits with the last hit knocking away. Also upon landing another hitbox is released.
· Lucas & Ness: PKT
· Mario & Luigi: Fireball
· Link & TL: Boomerang, Arrow, Bomb (Sweet-spot)
· Samus: Energy Ball (not fully charged), Missile, Ball Bombs
· ZSS: Plasma laser, Armor pieces
· Pikachu: Thunderbolt
· Diddy: Peanut (cracks)
· Pit: Arrows
· Pokemon Trainer: Ivysaur- Razorleaf
· Snake: Missile (harmlessly deflects)
· Peach: Turnips
· Yoshi: Eggs/Egg Roll
· IC: Ice Blocks (reflects/ splits on a sweet-spot)
· D3: Waddle Dee’s
· Lucario: Aura Sphere (not fully charged)
· Olimar: Pikmin
· R.O.B: Gyro
Up air : The Trumpet - (7%, 9%)
☼ hits on 6
☼ 39 duration
☼ 9 frames of landing lag
GW pulls out a trumpet that is aimed upward above him that puffs out two hitboxes that pop your opponents upward. In addition an area to the sides and well above the hitboxes will be affected by significantly reduced gravity allowing you to push your opponent upward, even when you miss with the actual hitboxes.
Down air : The Key - (13% (14% if it spikes), 6%)
☼ hits on 12
☼ 49 duration
☼ 15 frames of landing lag
☼ 3 frames of shieldstun (Aerial hitbox)
☼ 2 frames of shieldstun (Grounded hitbox)
GW pulls a key out of pretty good size and thrusts it below him. He is projected downward with a lot of speed (auto fastfall) and there is another hitbox released upon landing on the ground.
Getup Attacks
* Less Than 100 ledge - (8%)
Very poor range and speed for a less than 100 getup attack, not really recommended.
* Over 100 ledge - (10%)
Move becomes even slower and does a little bit more damage. If either of these get
shielded, you will likely get punished for it, again, not recommended.
* On the ground getup - (5%)
Gw swings his hammers on both sides (which he starts on depends on whether he's on his
belly or back) and each swing does 5%. Has decent range but is a tad slow, like the rest of
his getup options.
☼ Grabs Analysis - (3% for neutral grab hit)
Down throw - (6%)
GW juggles the opponent and then throws them to the ground.
Mr. Escalator was able to find out when characters were able to escape the down throw to down smash combination. Any character can escape this combo by teching when they hit the ground to the left, right, or in place. This chart only shows when characters can roll away to avoid it.
Red Characters - you can't hit them with your down smash as they can hold left or right while being thrown to escape
Orange Characters - you can only hit them if they do a get up attack from the ground, they can buffer rolls to escape
Green Characters - these characters can buffer a roll to escape your down smash but if they try to time the roll, you will likely hit them
Blue Characters - even if they buffer a roll you can hit them before they move.
Heavy Characters:
Dedede
DK
Ganondorf
Ike (is orange for the first throw)
Bowser
Snake
Charizard
Samus
Link
ROB
Medium Characters:
Lucario
Luigi
Ivysaur
Yoshi
Wario
Captain Falcon
Wolf
Mario (60-70% he turns red)
Sonic
Light Characters:
Peach
Pit
Diddy Kong
Toon Link (40-50% he turns red)
Ice Climbers
Lucas
Ness
Zelda
Olimar
Sheik
Very Light Characters:
Marth
Pikachu
Zero Suit Samus
Kirby
Meta Knight
Fox
Falco
Squirtle
Game and Watch
Jigglypuff
Notes about this list
* Any character can tech roll to avoid this combo
* Take note that the lighter characters are much easier to hit than the heavier characters
* Some characters change color depending on percents (as noted above)
Some recent testing I did on get up rolls and tech roll lengths. I was unable to find any other testing data on this on the rest of smashboards so i decided to do a crude test myself. Heres what I found:
...............roll...............tech
gw..........1.5...............1.1
lucario...1.95............1.2
ganon....1.75............1.4
rob.........1.75............1.4
jiggz.......1.3..............1.45
kirby......1.5..............1.5
pikachu.1.2..............1.5
ness.......2.................1.5
sonic......1.75............1.5
bowser..1.1..............1.5
wario.....1.65............1.5
olimar...1.5...............1.5
icies.......1.65............1.55
lucas......2.................1.55
diddy.....2..................1.6
meta k..1.75............1.6
t link......1.7..............1.7
mario....2..................1.75
samus...1.85............1.75
zss.........2..................1.75
sheik.....1.75............1.75
lizardon.1.4.............1.75
captain..1.85...........1.75
pit...........1.5.............1.8
snake....2.4..............1.8
dk...........1.75...........1.85
fox.........1.9..............1.85
luigi........2.5.............1.9
ike..........2.1.............1.9
marth....2.1.............1.95
yoshi......1.7.............1.95
ddd.........1.7.............1.95
falco.......1.95...........2
ivysaur..2.25...........2
peach.....2................2
wolf........1.9..............2
link.........2.1..............2.1
zelda.....2.25............2.25
squirtle.1.75............2.25
(i apologize for the terrible formatting, thank vbulletin for that)
Basically the numbers themselves are arbitrary, only meant to be contrasted to one another. You will want to check the value for the characters and to see what color they are. If they can escape the dsmash by just holding a direction then you'll want to check and see how far they will roll w/o teching. From my experience, at higher calibers of play most people will tech the dthrow and only sometimes buffer a roll. So i decided to sort this list by the tech roll length.
I've also found that when the tech roll length goes past 1.6, it becomes difficult to tech chase in my opinion (mk's length).
Up Throw - (8%)
GW juggles the enemy and then tosses him upward into the air.
Forward Throw/Back Throw - (8%)
GW juggles the enemy and then tosses him upward and in front of/behind gw.
☼ Stage Analysis:
Battlefield - It still has a lip under the stage, but it is much improved. I don't think i've been caught under it yet with gw's up b, so that is a definitely a plus. This stage has a very good platform layout that really helps with nair and up air pressuring. If you play this stage right it can be almost impossible for someone to approach from above.
Final D - this stage is the new battlefield for gw as he can be caught under the sides quite easily. Other than that this stage is fine, but i would probably avoid counterpicking it unless your playing against a marth or someone else whom also gets caught under. You would probably want to play this stage against campy opponents like toon link to be able to avoid their projectiles easier.
Lylat - this stage also has a battlefield type lip that is possible to get caught under. Boundaries on this stage are nice, but the platforms don't really seem to offer gw any sorts of advantages. I find that I get caught under this stage more than others, probably because of the tipping. However the platforms are very nice for neutral air pressuring and if you jump under the stage you can neutral air through the bottom.
Yoshi's Story - im leaning towords this stage to be my counterpick. Reason being that the stage slopes downward and it makes it much easier to edgeguard people coming from below on their recoveries with the downtilt. The boundaries aren't really all that ridiculous so i would say this is probably my best gw stage. Against campy opponents it can be very annoying since such a large platform makes it very easy to hide. Also the right ledge you can auto stand by jumping from the ledge.
Smashville - the moving platform is definitely interesting, however gw doesn't have any good throws that can kill at early percents (given that the platform is near the boundary). Other than that, good boundaries and the lip doesn't hurt too much, pretty neutral for gw.
Pokemon Stadium - im very torn on this stage. I like it because you can attack through the ledges to hit people and there are a lot of walls that spawn to allow you to do infinites. On the other hand, i can't count the amount of times that i've been caught under the stage or i tried to dj on to the stage and got caught under. Use at your own discretion i suppose.
Delphino Plaza - stage is a pretty good choice to counterpick on. You can very easily attack through the underside of the neutral portion of the level with your nair to pressure pretty safely. Also there are numerous parts of the level that have walls/nooks where you can infinite any character with your dtilt against. Only falco can chaingrab you off the stage so i wouldn't play it against him.
Corneria - if this stage is on, then it also would be a decent counterpick. Very low ceiling in most parts will work well with your downsmash to get very early kills. A fin on the right side will allow you to rack up a lot of damage with your downtilt (this is an infinite against most characters till 130 percent or so). If your feeling ventrous you can also bucket lasers.
Luigi's Mansion - this stage i hate a lot with gw. The platforms and ceilings here don't play very well into combo's that gw has and it veeery easy for campy players to camp here inside the mansion. I learned first hand that i hate this stage, maybe you'll have better luck with it.
Hanenbow - this stage is good against those who can chaingrab you (falco). Also if you pick the light blue color apparently its pretty hard to see gw moving around, might work for you try it out.
Norfair - lots of platforms to attack through, pretty neutral stage for gw to play on, i would probably use this against a falco to nerf his chaingrabbing. Very good layout for excessive nair pressure through the platforms, if the stage is on, i would use this against almost any character as the layout of the stage plays towords gw's moveset very well.
Pokemon Stadium 2, Frigate Orpheon, Halberd, Rainbow Cruise, Distant Planet, Brinstar - these stages all have little quirks to them, like orpheon flipping, brinstar lava, etc, but i don't think any of them hurt or help gw at all, i suppose using these stage would be entirely up to preference.
Pictochat - The edges are much more steep that that on yoshi's island, making it extremely easy to edge guard with the dtilt if you have decent timing. Also you can do the instant ledge get up on the right edge, which can be interesting if used right. Also it looks like you could get caught under the stage but there is an invisible wall there guarding that. Avoid this stage against lucario as it has a wall and he will live forever here.
These are my opinions on what i think are going to be the pretty common tournament legal stages. Currently I ban Lylat Cruise as my neutral ban, and lugi's mansion and hanenbow for my counterpick bans.
☼ Character Matchups:
This thread below has all of the matchups detailed with very up to date information on all the characters. It also shows how to deal with certain tactics they have.
http://www.smashboards.com/showthread.php?t=174763
☼ Resources:
Ok well this is all i have for now, feel free to post any suggests, typos, questions, or complaints you might have so i might make this guide better.
<edit 1> fixed typos and added comments and updates to the key, foxtrot, nair, uair, dtilt, neutral b, bucket, hammers, ftilt, utilt, and usmash.
<edit 2> rewrote the up air section (a friend suggested that it was a bit confusing), made slight changes to dair, upsmash, dash attack and other moves.
<edit 3> added percents to all the moves and made slight changes adding uses for moves
<edit 4> added more notes to most moves, threw in hylians pseudo pillar, and the percent/knockback chart that sodacova made. Also threw in a first version of a stage pro/con for gw.
<edit 5> added a few characters into a character matchup section
<edit 6> asthetic changes, added dthrow roll section from mr. escalator, up b tricks
<edit 7> added pictures sent to me by escalator, added color scheme, bulleted for neatness
<edit 8> added wolf/zss in char matchups, more pictures.
<edit 9> added projectile cancellation list, thanks neb
<edit 10> added resources section
<edit 11> went through and updated small things here and there
thanks to:
neb for the pictures
Table Of Contents:
- Pros/Cons List
- Advanced Techniques
- Game and Watch Mechanical Changes
- B Moves Analysis
- A Moves Analysis
- Grabs Analysis
- Stage Analysis
- Character Matchups
- Resources
☼ Pros:
- has a good edgeguard game due to good range forward air, back air, down air that spikes, down tilt and the frying pan for projectiles
- has a great sheild pressure game due to the long range, multi hitting back air that hits grabbers.
- has a great recovery that goes very high, can float horozontally after the peak, and can be cancelled by attacking after the peak
- has a good grab game because his downthrow allow you to tech chase
- is pretty strong kill wise, can use fsmash, downsmash, upsmash, fair along with the dair, chair, bair, and up air occasionally
- gaw can bucket energy based projectiles, which ruins some opponents chance to be campy
- has a huge amount of priority and disjointed hitboxes with most of his moves
☼ Cons:
- gaw is very light, which means he'll die earlier than most opponents
- gaw lacks a tight projectile game that allows you to pressure your opponent
- has a lot of landing lag with aerials and cooldown on a lot of smashes and ground moves
- has poor grab range
- has somewhat telegraphed kill methods, making it sometimes hard to land a kill.
☼ Advanced Techniques
* Bucket Braking - if when you get hit by a strong attack, immediately start doing a neutral air a soon as possible. As soon as you are done with the nair, do a down b which cancels all of your momentum. This will help you live 10-15 percent longer for short kill paths and even up to 30-40 percent longer going all the way across the stage.
☼ Game and Watch Mechanics (and changes from melee)
* Shield is significantly improved from melee, you will find that you get shield poked about the same as any other character would
* Rolling and sidestepping both have more invincibility and less lag. Sidestepping can now be usefull without being punished and rolling is good for when you use it sporadically.
* Weight seems to be buffed a slight bit. Gw would be killed very early in melee, and even though he's the third lightest character still, the weights in this game seem to be much more balanced.
* Grab range and speed seem to be mostly unchanged. The range falls in the average range for non grapple grabbers, and speed is also pretty average. His pummel is very slow but hits for 3%.
* Has a pretty good fox trot for those who would incorporate this into their game, watch out for tripping though.
* Game and Watch's glide toss is very good but also very hard to pull off. To use this, in the beginning of your roll, throw an item using the cstick and gw will slide very far across the ground while throwing.
* Airwalking is possible for game and watch with his dair. To do this, run off the stage and press C down and then di back to the stage. If done right you'll be able to use your dair right next to the stage w/o needing to jump.
* Key stomping is possible by pressing down and then c down on a platform. this lets you hop up slightly as you dair with little lag. You can do this repeatedly with little lag and can hit a lot of people below you.
* Hugging is pretty easy to do with game and watch, simply run off the edge and then di towards the stage to grab it.
☼ B Moves Analysis-
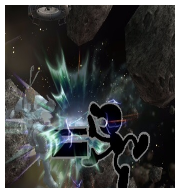
Up B : The Firemen - (6%)
☼ 8 startup (he jumps on 9)
☼ 5 frames of complete invincibility (frames 9 - 13)
GW gains a lot of height by jumping off a trampoline and then deploys a parachute at the peak of his jump which slows his fall and allows him to manipulate his trajectory on the way down.
- you can attack out of the parachute portion which will cancel the slow fall
- if you attack just as he is going to deploy the parachute, you will auto fastfall. You will also retain your second jump if you haven't used it yet.
- this move is very good for catching characters that recover very high like pit and snake and knocking them back out
- if you knock an opponent up on the stage and up b to a canceled fair or nair, you can begin to pillar the opponent in a sense. It is possible to di out of this pillar. Credit to hylian for discovering this.
- up b grants invincibility frames upon leaving the ground to about a third of the way up the jump.
- when the base of the up b is used near opponents or teammates, you will push them up. This can be effective against some recoveries like ness.
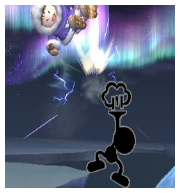
Side B : The Hammers
☼ hits on frame 16 (all hammers)
☼ hitbox lasts 16-22
☼ 25 cooldown
☼ 47 total
☼ Move can be b-sticked with good results
GW pulls a hammer out which is a random number between 1 and 9 that have varying effects. The random generator for these hammers follows these rules
- On the first pull of a stock, you cannot pull a 1 or a 2.
- On the second pull of a stock, you cannot pull a 1 or the last number you pulled.
- For third and subsequent pulls, you cannot pull either of the last two numbers pulled
1 - 12% to self, 2% to opponent with no knockback
2 - 4%, little knockback to opponent
3 - 6%, knock opponent behing gw
4 - 8%, hit opponent away
5 - 12% total (4 hits, 3% each), electric stun
6 - 12%, fire hit that semi spikes
7 - 14%, food spawns next to gw that heals 4%
8 - 9%, opponent gets encased in ice
9 - 32%, opponent almost always gets instant k-o'd and gw taunts in the middle
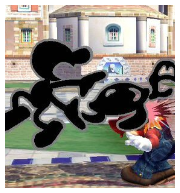
Neutral B : The Frying pan - (pan 9%, projectiles 4% each)
GW pulls out a frying pan and begins to flip out fish, sausage, and steak. The projectiles will fly upward and then downward with varying arcs.
- This move is good near the edge to pressure your opponents when edge guarding
- The pan itself does damage and can be considered a semi-spike
- This move no longer alters your falling speed
- Some characters can be pressured on the stage when this move is used at a medium range as it can provoke them into right at you which will be predictable.
- If this move is buffered (out of an air dodge for example), then gw will automatically shoot 5 pieces of food.
- It is possible to b-reverse or b-stick this move with a pretty good amount of momentum shift.
Down B : The Bucket
Collecting:
☼ begins collecting on frame 6
☼ minimum total time out without charge collecting: 50
☼ 13 cooldown (13 frames where the bucket is not out)
☼ after a charge is collected (when a bar fills up in the bucket, not the collecting animation) it takes 72 frames to shield
Releasing:
☼ Closest - hits on frame 2
☼ Midway - hits on frame 8
☼ Tip of the spill - hits on frame 14
GW pulls out a bucket that can catch any energy based projectile. Upon catching a projectile, GW gains invincibility frames and can catch any projectiles in succession. After three projectiles have been caught, GW can empty the contents of the bucket in front of him with a powerful hitbox.
- This move is great for pressuring campers
- Increases damage output compared to the input by a set factor
- Move is the same strength when used in the air, different from melee
- Works best out of down throw to tech chase.
- The third collection has almost no catching lag.
Mr. Escalator revised the chart that categorizes the effects of the down b (ko's are referenced from the middle of final d)
18% damage, won't KO until well over 100
Charizard - fire breath
Ice Climber - breath
Bowser - fire breath
Ness - pk thunder tail
Ness - pk fire pillar
Lucas - pk thunder tail
Fox - back throw
Fox - forward throw
Fox - blaster (long range)
Falco - back throw
Falco - forward throw
25% damage, KOs around 65% with no DI
Lucas - PK Fire
Fox - blaster (short range)
Falco - blaster
Samus - uncharged shots
Peach - counter (pan foods)
DDD - beam attack from waddle
33% damage
Ness - PK Fire
Yoshi - Down B Stars
ZSS - uncharged neutral b
Kirby - frying pan
42% damage, KOs around 20% with no DI
Robot - optic blast
Mario - fireballs
Pit - arrows
Dedede - Up B stars
Lucas - pk fire explosion
Kirby - final cutter (short range)
44% damage
Lucario - uncharged energy ball
50% damage, KOs at 0% with no DI
Lucario - forward b (max range of move)
Pikachu - neutral B lightning (after the projectile hits the ground)
Wolf - blaster
Luigi - fireball
Kirby - final cutter (long range)
ZSS - charged neutral B
60% damage, KOs at 0% even with DI
Pikachu - down B lightning (can max in one go if you catch under pikachu on a platform)
Pikachu - neutral b (ball form)
Zelda - Din's Fire
Lucas - PK Freeze
Lucas - PK Thunder
Ness - PK Flash
Ness - PK Thunder
Lucario - fully charged energy balls
Lucario - forward b (closest range possible)
Samus - fully charged shots
ZSS - downsmash (any charge)
Rob - optic blast (charged)
Pit - arrows (charged)
See the resources section for better explanation on how the bucket works.
☼ A Moves Analysis-
Jab : The Greenhouse - (3% for initial jab, 1% for subsequent)
Single jab:
☼ hits on frame 4
☼ hitbox lasts 4-6
☼ 9 cooldown
☼ 15 total
☼ 1 frame of shieldstun
Combo hits:
☼ 3 startup (so it would hit on frame 12)
☼ 0 cooldown
GW pulls out a pump in front of him that has a puff of air as a hitbox. This can be done in rapid succession to hold your opponent up.
- Ducking, jumping, and pressing b will cancel the rapid fire part the fastest. Sheilding will take as long as releasing a.
- Single jabbing and dtilting alternated is great for sheild pressuring.
- Use after an autocancelled nair and then grab right after for an excellent shield pressure technique.
Here's a list of projectiles that gw can cancel out with his jab. (courtesy of Neb)
· Mario & Luigi: Fireball
· Link: Arrows (not fully charged), Boomerang
· Samus: Energy Ball (not fully charged), Missile (only seeker)
· ZSS: Plasma Laser
· Pikachu: Thunderbolt
· Diddy: Peanut (no lag/disintegrates)
· Pit: Arrows
· PT: Ivysaur- Razorleaf
· Snake: Missile (Slows momentum/redirects)
· Peach: Turnips
· Yoshi: Egg Roll
· IC (Ice Climbers): Ice Block (reflects back!)
· D3: Waddle Dee’s
· Ness: PKT
· Wario: Bike/Bike parts
· TL: Same as link
· Olimar: Pikmin
· R.O.B: Gyro (not fully charged)
Forward Tilt : The Chair - (10%)
☼ hits on 10
☼ 35 duration
☼ Between 17-20 cooldown
☼ 4 frames of shieldstun
GW pulls out a chair holding it by the backrest. It extends in front of him with a long lasting hitbox (possibly the longest of of his single hitboxes).
- This move has the potential to kill opponents around 120-150 if the move is still fresh
- although the move looks like it would last a long time and would punish spot dodgers, the forward smash will be able to do this much better.
- dilt is better for pushing your opponent away and the dsmash is only 5 frames slower for kills, i wouldn't reccomend using this move.
Forward Smash : The Match - (18-25%)
☼ hits on frame 17
☼ 10 cooldown
☼ 42 total
☼ 6 frames of shieldstun
GW pulls out a match by the handle that has a flame atop of it that hits your opponents. The hitbox stays out for a while but is the strongest when first pulled out.
- One of GW's strongest killing moves, you'll find yourself killing off the top/sides with this around 90-100%
- The hitbox lasts a long time which means you can punish people who spot dodge the initial frames of the move, although the later hitbox is considerably weaker
- You can land this move pretty easily if you know which way your opponent will roll out your down throw
- This move can be pulled out fairly quickly out of the shield
Down Tilt : The Manhole - (6% [9% anti-air])
☼ hits on frame 6
☼ Hitbox begins on frame 6
☼ Hitbox ends on frame 25
☼ 0 cooldown
☼ 2 frames of shieldstun
GW "flips" a panel in front of him that is a manhole cover. This is GW's furthest reaching move (other than oil panic) having had its range greatly extended from melee. This move will push your opponent away a formidable distance away from you when connecting.
- This move is extremely good for edgeguarding characters that are coming to the edge horozontally or sometimes from below.
- Being one of GW's fastest ground moves, your able to beat out a lot of opponents approaches on the ground by speed.
- This move also has a lot of priority which allows you to outreach 95% of everyone else's ground attacks.
- The move does more damage (9%) when the opponent is in the air. This allows the dtilt to hit snake out of his up, which is very useful (you need 7+% to do that).
· Mario & Luigi: Fireball
· Link: Arrows (not fully charged), Bombs (At a distance), Boomerang
· Samus: Energy Ball (not fully charged), Missile (only seeker)
· ZSS: Plasma Laser/Whip (Sweet-Spot)
· Pikachu: Thunderbolt
· Diddy: Peanuts (No lag/ disintegrates them)
· Pit: Arrows
· PT (Pokemon Trainer): Ivysaur- Razor Leaf, Charizard- Flamethrower
· Snake: Missile (Redirects), D-smash mine (Harmlessly detonates)
· Peach: Turnips
· Yoshi: Egg Roll
· D3: Waddle Dee’s
· Lucario: Aura Sphere
· Ness- PKT
· Wario- Bike parts/Bike
· Olimar: Pikmin (PWNage)
· TL- Same as link
Down Smash : The Hammers - (15-21% tip, 13-18% mid)
☼ hits on frame 15
☼ 10 cooldown
☼ 33 total
☼ 4 frames of shieldstun
GW pulls out two hammers on either side of him and slams them to the ground. This move sends opponents two ways: upwards very fast if you sweetspot it (end of the hammers) or to the sides pretty far if it wasn't sweetspotted.
- Another one of GW's overpowered kill moves. Don't be surprised to be killing the heaviest characters at 80-90% when you sweetspot this move.
- When not sweetspotted, you will send your opponent out at a near semi-spike trajectory which is hard to recover from.
- Excellent move to use out of your down throw, whether your opponent techs it or not.
- When charged to release, you can catch people air dodging near your character considering it has a quick release time and it covers such a wide area. Watch out for people attacking the upper part of your frame when charging as this move doesn't cover upwards at all.
Up tilt : The Flag - (8%)
☼ hits on 13
☼ 29 duration
☼ Between 3-8 cooldown
☼ 2 frames of shieldstun
GW pulls a flag out above his head and sweeps it above him. Pops your opponent up slightly.
- This move is good to catch your opponent in early as you can chain at least 3-4 in a row together w/o them di'ing out of it.
- Doesn't hit as far in front of you like it did in melee, so don't depend on it doing anything but hitting above you.
- Use neutral airs after they can di out of it for a truly devastating combo.
Up smash : The Helmet - (18-25%)
☼ hits on frame 24
☼ 10 cooldown
☼ 38 total
☼ 6 frames of shieldstun
GW has a diving helmet on his head and he rocks his head back and then forward. This will send your opponent upward.
- Another great kill move, will kill opponents at even lower percents than the downsmash, which is absurd, easily his strongest smash.
- Very slow, so don't use it too predictably, you will probably be punished for it.
- Running behind your opponent and doing a sliding upsmash works pretty well because when he rears his head back it actually reaches back pretty far
- Although the startup of the move is rather slow for a smash attack, when charged to a release, it is incredibly fast, something like 2 frames. If you see an opening to punish a dropping opponent then start charging an upsmash, the large arc of the attack or the high priority of the move will usually win.
Dash attack : The Headbutt - (11%)
GW puts another helmet on and runs forward with his head in front. GW will slow down as the move proceeds.
- This move can hit opponents hanging on the edge and will spike them into the stage (excellent against mk's up b and side b)
- Has a lot of priority and can cancel a lot of other attacks including marth's forward smash etc
- Useful as a last ditch tech chase if your too far away to get a grab in
- Could possibly combo them together like in melee if your opponent has bad di.
Neutral air : The Fishbowl - (first hit is 5%, the next three are 4%, 17% total)
☼ hits on frame 7
☼ 34 duration
☼ 8 frames of midair cooldown
☼ 9 frames of landing lag
☼ 1 frame of shieldstun (Multihit)
GW pulls out a fishbowl above his head that has fish pop out of the top of it in a fountain like path. Each hit stuns and pulls in except for the last hit which sends your opponent upward slightly.
- This move is excellent for combo'ing given that it is possible to chain at least 3-4 of these together for a lot of percent
- This move has very little lag after landing from it making it excellent to pressure shields with.
- It is possible to pull people down who are off the stage if you fastfall through them with the hitbox out.
- If your opponent is above you on a platform, this is very good to pressure his shield with.
- It is very difficult to airdodge through this move, use that to your advantage to punish air dodgers, also works well in conjunction with the up air spamming for when they try to air dodge through the puffs.
- If the last hit of the move does not connect and your opponent is grounded, it is possible to chain this together with a dsmash if the opponent does not immediately jump.
Forward Air : The Box - (16% early frames, 6% late frames)
☼ hits on 10
☼ 44 duration
☼ 22 frames of landing lag
☼ 5 frames of shieldstun
GW pulls out a box-like object (many names for this move are floating around) that hits opponents pretty far in front of gw. This move hits the opponent out and away and the move is strongest when first pulled out and weakens the longer it's out.
- Has a lot of reach and can therefore win a lot of aerial matchups.
- Don't use this move shorthopped like in melee, it has a lot of landing lag
- Great for edgeguarding as it sends the opponent back out.
- This move actually has a lot of strength to it, you'll kill with it a lot assuming its fresh
Back Air : The Turtle - (5 hits, 3% each, 15% total)
☼ hits on frame 10
☼ Duration: 39 frames
☼ 12 frames of landing lag
☼ 1 frame of shieldstun (Multihit)
GW pulls out a turtle with formidable range behind him. This move multi hits with the last hit knocking away. Also upon landing another hitbox is released.
- Using spacing and this move, you can get an approach that is nearly unbeatable
- This move can combo pretty well and it is possible to chain this attack with itself a few time.
- This move works very well on people who shield as it eats the shield and has a landing hit to attack grabbers.
- This move can cancel out a lot of projectiles out that you normally couldn't bucket due to its priority and range
- It is possible to for your opponent to smash di out of this attack, but it shouldn't leave you vulnerable. Only characters with fast aerials can punish you for it, but this can also be avoided if you predict this will happen. If you have mk caught in it, and he di's out, he will dair you, so start shifting away from him, etc.
- EDIT : It is becoming more commonplace in the current scene for players to be skilled enough to consistently punish this attack. Many characters are capable of running into the turtle, powershield one of the hits, and then grab you right out of it. They are also capable of taking intentional hits, di'ing out quickly, and then counterattacking you. Make your use of the turtle only to hit with the very tip of the move and be ready to move back at a moments notice.
- Hylian has come up with an interesting tactic to counter those who would punish the turtle on command. If you drop the turtle near the ground before any of the hitboxes come out (ie: less than 10 frames into the attack) the turtle will cancel immediately but it will still look like as though there is a hitbox out. You can then grab if your close enough (pivot around) or even drop out a forward smash. This is known as turtle cancelling i believe, a tricky tactic to fake your opponent out.
· Lucas & Ness: PKT
· Mario & Luigi: Fireball
· Link & TL: Boomerang, Arrow, Bomb (Sweet-spot)
· Samus: Energy Ball (not fully charged), Missile, Ball Bombs
· ZSS: Plasma laser, Armor pieces
· Pikachu: Thunderbolt
· Diddy: Peanut (cracks)
· Pit: Arrows
· Pokemon Trainer: Ivysaur- Razorleaf
· Snake: Missile (harmlessly deflects)
· Peach: Turnips
· Yoshi: Eggs/Egg Roll
· IC: Ice Blocks (reflects/ splits on a sweet-spot)
· D3: Waddle Dee’s
· Lucario: Aura Sphere (not fully charged)
· Olimar: Pikmin
· R.O.B: Gyro
Up air : The Trumpet - (7%, 9%)
☼ hits on 6
☼ 39 duration
☼ 9 frames of landing lag
GW pulls out a trumpet that is aimed upward above him that puffs out two hitboxes that pop your opponents upward. In addition an area to the sides and well above the hitboxes will be affected by significantly reduced gravity allowing you to push your opponent upward, even when you miss with the actual hitboxes.
- To combo with this move now, you have to be very precise with the hitboxes as it is easy to knock your opponent into the "puff" zone
- This move is good to annoy your opponent and possibly make them waste jumps or put them in a bad position.
- It is possible to kill people off the top of the stage with this move although it is quite difficult to pull it off consistently.
- In teams this move could be very useful to save your teammate (it will cancel all of their momentum and stop them in their tracks) or to mess up your opponents (if they air dodge, this move will catch them on their way out with the second puff).
- If only the air portion of the move hits, it will still be considered a 'hit' in the stale moves registry. Thus if you use this move frequently, you can keep all of your good moves fresh.
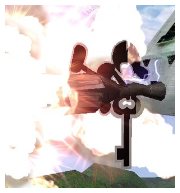
Down air : The Key - (13% (14% if it spikes), 6%)
☼ hits on 12
☼ 49 duration
☼ 15 frames of landing lag
☼ 3 frames of shieldstun (Aerial hitbox)
☼ 2 frames of shieldstun (Grounded hitbox)
GW pulls a key out of pretty good size and thrusts it below him. He is projected downward with a lot of speed (auto fastfall) and there is another hitbox released upon landing on the ground.
- This move has a lot of priority and range and will beat a lot of uptilt/airs/smashes
- On platforms, you can stab enemies below you and pressure them if they are shielding.
- Check the mechanics section to see how to use airwalking and key stomping effectively.
- This move isn't too good vs shielding enemies because they quickly learn to wait for the ground part of the hit and then grab. Newcomer game and watches will tend to overuse this move because they see how much priority is has. However, at high levels of play this move is punished rather easily. Learn to slowfall the key and move away if it looks like your going to land in punishable territory.
- This move can still spike if you hit with the initial frames of the attack
- If you press down while auto-fastfalling you will slowfall, a property unique only to game and watch.
Getup Attacks
* Less Than 100 ledge - (8%)
Very poor range and speed for a less than 100 getup attack, not really recommended.
* Over 100 ledge - (10%)
Move becomes even slower and does a little bit more damage. If either of these get
shielded, you will likely get punished for it, again, not recommended.
* On the ground getup - (5%)
Gw swings his hammers on both sides (which he starts on depends on whether he's on his
belly or back) and each swing does 5%. Has decent range but is a tad slow, like the rest of
his getup options.
☼ Grabs Analysis - (3% for neutral grab hit)
Down throw - (6%)
GW juggles the opponent and then throws them to the ground.
- Your opponent can choose to land on your right or left side through DI
- Your opponent can tech this attack by pressing l or r and can escape any supposedly "infinite" combos
- Make good use of tech chasing to rack up a lot of damage
- Fsmash, upsmash, dsmash, another grab, jabs, dtilts, and dash attacks all work very well to punish your enemies rolls
Mr. Escalator was able to find out when characters were able to escape the down throw to down smash combination. Any character can escape this combo by teching when they hit the ground to the left, right, or in place. This chart only shows when characters can roll away to avoid it.
Red Characters - you can't hit them with your down smash as they can hold left or right while being thrown to escape
Orange Characters - you can only hit them if they do a get up attack from the ground, they can buffer rolls to escape
Green Characters - these characters can buffer a roll to escape your down smash but if they try to time the roll, you will likely hit them
Blue Characters - even if they buffer a roll you can hit them before they move.
Heavy Characters:
Dedede
DK
Ganondorf
Ike (is orange for the first throw)
Bowser
Snake
Charizard
Samus
Link
ROB
Medium Characters:
Lucario
Luigi
Ivysaur
Yoshi
Wario
Captain Falcon
Wolf
Mario (60-70% he turns red)
Sonic
Light Characters:
Peach
Pit
Diddy Kong
Toon Link (40-50% he turns red)
Ice Climbers
Lucas
Ness
Zelda
Olimar
Sheik
Very Light Characters:
Marth
Pikachu
Zero Suit Samus
Kirby
Meta Knight
Fox
Falco
Squirtle
Game and Watch
Jigglypuff
Notes about this list
* Any character can tech roll to avoid this combo
* Take note that the lighter characters are much easier to hit than the heavier characters
* Some characters change color depending on percents (as noted above)
Some recent testing I did on get up rolls and tech roll lengths. I was unable to find any other testing data on this on the rest of smashboards so i decided to do a crude test myself. Heres what I found:
...............roll...............tech
gw..........1.5...............1.1
lucario...1.95............1.2
ganon....1.75............1.4
rob.........1.75............1.4
jiggz.......1.3..............1.45
kirby......1.5..............1.5
pikachu.1.2..............1.5
ness.......2.................1.5
sonic......1.75............1.5
bowser..1.1..............1.5
wario.....1.65............1.5
olimar...1.5...............1.5
icies.......1.65............1.55
lucas......2.................1.55
diddy.....2..................1.6
meta k..1.75............1.6
t link......1.7..............1.7
mario....2..................1.75
samus...1.85............1.75
zss.........2..................1.75
sheik.....1.75............1.75
lizardon.1.4.............1.75
captain..1.85...........1.75
pit...........1.5.............1.8
snake....2.4..............1.8
dk...........1.75...........1.85
fox.........1.9..............1.85
luigi........2.5.............1.9
ike..........2.1.............1.9
marth....2.1.............1.95
yoshi......1.7.............1.95
ddd.........1.7.............1.95
falco.......1.95...........2
ivysaur..2.25...........2
peach.....2................2
wolf........1.9..............2
link.........2.1..............2.1
zelda.....2.25............2.25
squirtle.1.75............2.25
(i apologize for the terrible formatting, thank vbulletin for that)
Basically the numbers themselves are arbitrary, only meant to be contrasted to one another. You will want to check the value for the characters and to see what color they are. If they can escape the dsmash by just holding a direction then you'll want to check and see how far they will roll w/o teching. From my experience, at higher calibers of play most people will tech the dthrow and only sometimes buffer a roll. So i decided to sort this list by the tech roll length.
I've also found that when the tech roll length goes past 1.6, it becomes difficult to tech chase in my opinion (mk's length).
Up Throw - (8%)
GW juggles the enemy and then tosses him upward into the air.
- It is possible for your opponent to di left and right slightly
- Against characters that have either long techrolls, or get out of the dthrow combos easily you will want to throw them up to start up air juggling them to rack up damage with neutral airs. (Snake is a good example of this)
- Use conditioning with this throw for best results. If you always do a nair right after with a chase, they will start to airdodge the attack. This is when you do an up air to stall them just as they come out of the airdodge and then double jump right into a nair.
Forward Throw/Back Throw - (8%)
GW juggles the enemy and then tosses him upward and in front of/behind gw.
- The enemy can di this move horizontally if going away from game and watch and almost vertically if holding towards GW
- These throws are good to try and get your opponent off the stage and its possible to get them expecting a down throw and to DI the wrong way since the wind up is identical
☼ Stage Analysis:
Battlefield - It still has a lip under the stage, but it is much improved. I don't think i've been caught under it yet with gw's up b, so that is a definitely a plus. This stage has a very good platform layout that really helps with nair and up air pressuring. If you play this stage right it can be almost impossible for someone to approach from above.
Final D - this stage is the new battlefield for gw as he can be caught under the sides quite easily. Other than that this stage is fine, but i would probably avoid counterpicking it unless your playing against a marth or someone else whom also gets caught under. You would probably want to play this stage against campy opponents like toon link to be able to avoid their projectiles easier.
Lylat - this stage also has a battlefield type lip that is possible to get caught under. Boundaries on this stage are nice, but the platforms don't really seem to offer gw any sorts of advantages. I find that I get caught under this stage more than others, probably because of the tipping. However the platforms are very nice for neutral air pressuring and if you jump under the stage you can neutral air through the bottom.
Yoshi's Story - im leaning towords this stage to be my counterpick. Reason being that the stage slopes downward and it makes it much easier to edgeguard people coming from below on their recoveries with the downtilt. The boundaries aren't really all that ridiculous so i would say this is probably my best gw stage. Against campy opponents it can be very annoying since such a large platform makes it very easy to hide. Also the right ledge you can auto stand by jumping from the ledge.
Smashville - the moving platform is definitely interesting, however gw doesn't have any good throws that can kill at early percents (given that the platform is near the boundary). Other than that, good boundaries and the lip doesn't hurt too much, pretty neutral for gw.
Pokemon Stadium - im very torn on this stage. I like it because you can attack through the ledges to hit people and there are a lot of walls that spawn to allow you to do infinites. On the other hand, i can't count the amount of times that i've been caught under the stage or i tried to dj on to the stage and got caught under. Use at your own discretion i suppose.
Delphino Plaza - stage is a pretty good choice to counterpick on. You can very easily attack through the underside of the neutral portion of the level with your nair to pressure pretty safely. Also there are numerous parts of the level that have walls/nooks where you can infinite any character with your dtilt against. Only falco can chaingrab you off the stage so i wouldn't play it against him.
Corneria - if this stage is on, then it also would be a decent counterpick. Very low ceiling in most parts will work well with your downsmash to get very early kills. A fin on the right side will allow you to rack up a lot of damage with your downtilt (this is an infinite against most characters till 130 percent or so). If your feeling ventrous you can also bucket lasers.
Luigi's Mansion - this stage i hate a lot with gw. The platforms and ceilings here don't play very well into combo's that gw has and it veeery easy for campy players to camp here inside the mansion. I learned first hand that i hate this stage, maybe you'll have better luck with it.
Hanenbow - this stage is good against those who can chaingrab you (falco). Also if you pick the light blue color apparently its pretty hard to see gw moving around, might work for you try it out.
Norfair - lots of platforms to attack through, pretty neutral stage for gw to play on, i would probably use this against a falco to nerf his chaingrabbing. Very good layout for excessive nair pressure through the platforms, if the stage is on, i would use this against almost any character as the layout of the stage plays towords gw's moveset very well.
Pokemon Stadium 2, Frigate Orpheon, Halberd, Rainbow Cruise, Distant Planet, Brinstar - these stages all have little quirks to them, like orpheon flipping, brinstar lava, etc, but i don't think any of them hurt or help gw at all, i suppose using these stage would be entirely up to preference.
Pictochat - The edges are much more steep that that on yoshi's island, making it extremely easy to edge guard with the dtilt if you have decent timing. Also you can do the instant ledge get up on the right edge, which can be interesting if used right. Also it looks like you could get caught under the stage but there is an invisible wall there guarding that. Avoid this stage against lucario as it has a wall and he will live forever here.
These are my opinions on what i think are going to be the pretty common tournament legal stages. Currently I ban Lylat Cruise as my neutral ban, and lugi's mansion and hanenbow for my counterpick bans.
☼ Character Matchups:
This thread below has all of the matchups detailed with very up to date information on all the characters. It also shows how to deal with certain tactics they have.
http://www.smashboards.com/showthread.php?t=174763
☼ Resources:
Ok well this is all i have for now, feel free to post any suggests, typos, questions, or complaints you might have so i might make this guide better.
<edit 1> fixed typos and added comments and updates to the key, foxtrot, nair, uair, dtilt, neutral b, bucket, hammers, ftilt, utilt, and usmash.
<edit 2> rewrote the up air section (a friend suggested that it was a bit confusing), made slight changes to dair, upsmash, dash attack and other moves.
<edit 3> added percents to all the moves and made slight changes adding uses for moves
<edit 4> added more notes to most moves, threw in hylians pseudo pillar, and the percent/knockback chart that sodacova made. Also threw in a first version of a stage pro/con for gw.
<edit 5> added a few characters into a character matchup section
<edit 6> asthetic changes, added dthrow roll section from mr. escalator, up b tricks
<edit 7> added pictures sent to me by escalator, added color scheme, bulleted for neatness
<edit 8> added wolf/zss in char matchups, more pictures.
<edit 9> added projectile cancellation list, thanks neb
<edit 10> added resources section
<edit 11> went through and updated small things here and there
thanks to:
neb for the pictures
")
