GwJ
Smash Hero
WARNING: This has not been updated in something like 3 years. The actual data itself is still accurate. However, in the case of tips and techniques, assume that there are more techniques/tips and that they are probably outdated.
ROB The ROBot Community Guide

Well, I said I would start one and here it is. I want everyone who knows their stuff (you know who you are) to participate in this, as well as anyone else, but make sure your information is correct, as you don't want your own community guide incorrect.
Table of Contents
I. Summary
II. Moveset Breakdown
III. Advanced Techniques
IV. Stages
V. Tips
I. Summary
First off is a summary. I want EVERYONE from the ROB community to post their general overview with things like advantages, disadvantages, general tactics, and whathaveyou.Important threads:
ROB video thread
ROB Q&A
Matchup Thread
Defragmentation
ROB Directory
Note how these are ALL sticky threads. I am noting these because people have the tendency to disregard those threads that are viewed as the most important in the forum. Please read them and post your questions/comments in the appropriate thread. This is not a forum guide, but this is a ROB guide, and everyone knows ROBots like to be tidy and organized.
Advantages of playing ROB:
One of the best gimpers in the game.
One of the longest livers in the game.
*(T.R.D.S.) said:His recovery is among the best in the game, can be used to make a WoP.
He has a reflector, albeit slow, but a reflector nonetheless that can also be used to aid his recovery.
His Gyro can be used to GT and can be dribbled.
His laser is good at any level. Even the weakest level is good at close range for the knockback and flame damage.
His Bair can aid his recovery, and can be used to stop momentum.
Fair can be used as a kill move when fresh, and be comboed into itself when not.
Uair is beast with its damage-racking capabilities.
Dair is a reasonable Meteor Smash (Spike).
Disadvantages of playing ROB:Mag!c said:-One of the, if not the best, recoveries in the game.
-Strong range and good projectiles make ROB an excellent camper.
-Excellent offstage game that produces gimp opportunities due to an extremely flexible recovery.
-Very good poke game with strong priority that make ROB good at brickwalling.
-Individual moves have many useful or flexible applications, such as:
F-Air being a kill move when fresh, but a combo move when stale, as well as ROB's momentum cancel.
B-Air giving extra distance in recovery, while also forming a wall and auto-spacing.
Gyro (Down-B) serving as both a feint (Gyro Cancel), as a turn-around similar to the Shine or Cape (Reverse Gyro), and a mobility tool (Glide Toss).
-Excellent glide toss makes for increased mobility and varied followups.
-Good survivability, fairly heavy.
-Overall a well-balanced character that appeals to people who enjoy a safety, stability, slaying fleshy meatbags, and butthole.
ROB's body is rather oddly shaped, so because of this shape, ROB tends to get hit from moves you would not expect to be hit from.
ROB's got a blindspot at the diagonals, so image clock hands around 1/2, 4/5, 7/8, and 10/11. ROB has a difficult time managing when the opponent approaches at those angles.
Killing Power; ROB's killing moves stale pretty often and you need to make a conscious effort to save one or you'll be stuck with all decayed kill moves.
*(T.R.D.S.) said:The Robo Beam is a great move, but it has some flaws. It can be spotdodged to easily, only one of its levels is a viable kill move, and the other ones are only useful for disruting approaches. The best advice I can give for this is to follow up with a Gyro Shot. It doesn't even have to be fully charged. As long as it hits the opponent, it's good.
Mag!c said:-Difficulty killing. ROB's N-Air and/or B-Air must be actively conserved to land crucial kills if his offstage game fails to produce gimps. This is a problem, due to N-Air's useful properties as a punish and all around useful aerial, and the B-Airs application as a brickwall and auto-spacer. U-Throw does not kill until the opponent is very high in percents.
-Awkward blind spots. Refer to other sections of the guide on where they are, and potential ways to deal with them.
-Strange Footstool animation leads to some characters having an infinite on ROB. Some of these characters are relatively laughable (Captain Falcon) while others can be quite dangerous (Zero Suit samus). I couldn't resist.
-Somewhat large body leaves ROB vulnerable to characters who can string together multiple hits well, such as Metaknight.
-Projectiles can be powershielded and are not "infinite" like Falco's laser, reducing ROB's effectiveness at camping against some people. Not to say it is completely ineffective, just that you cannot expect to sit on the edge of Final Destination and chuck projectiles all day.
-Some characters may not like butthole, reducing your friendship and available amount of conversation with other character mains.
II. Moveset Breakdown
ALL PERCENTS NOTED ARE UNDECAYED PERCENTSMiscellaneous
Jumping Frame Data
Jump Start: 5 Frames
Duration (Without fastfalling)
Short Hop: 49 Frames
Full Hop: 75 Frames
Crouching 1 Frame
A - Jab 3%
Frame Data:
Hitbox out: Frame 3
Hitbox end: Frame 7
IASA: Frame 20
Move End: Frame 25
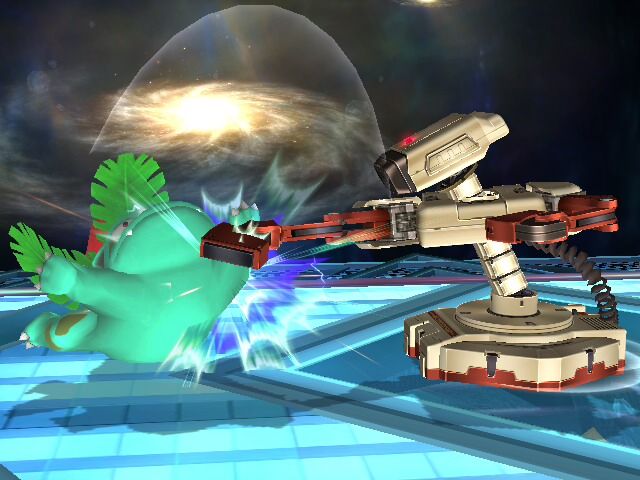
A single jab. Like some jabs in the game (Falco, CF), it can lead into a grab. It shouldn't, because you have enough time to get out, but it happens a lot.
AA - Jab combo 3% (Total of 6% if both hit)
Frame Data:
Hitbox out: Frame 3
Hitbox end: Frame 7
IASA: Frame 20
Move End: Frame 25
ROB's only got a two-jab combo; a very nice GTFO move.
Frame Data:
Hitbox out: Frame 7
Hitbox end: Frame 9
IASA: Frame 31
Move End: Frame 40
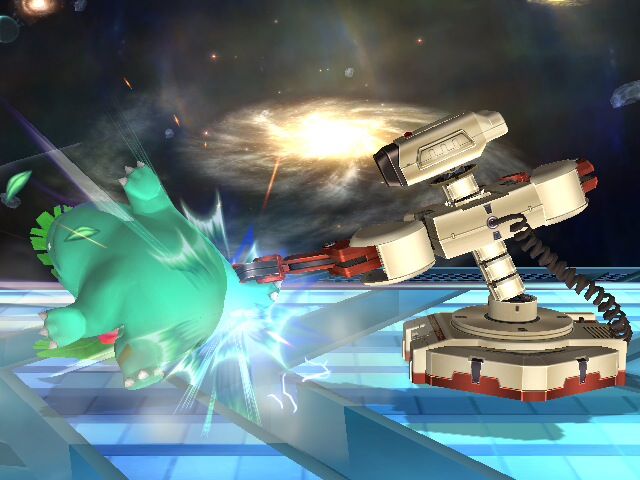
This is a nice move to use for Utilt or Usmash setups. Basically this move has two different types of knockback. If you hit with the end of ROB's 'hands' the opponent will be sent forward out of reach for a Utilt but sets up for some Ftilt, Fair, whatever you want. If you happen to hit with the inside of ROB's 'hands', the opponent will pop up above ROB and sets up for a few Utilts which leads into a Usmash, Uair, Bair, Fair, depending on their DI.
Attack Button while 'laying' on the ground - Get-up Attacks
Frame Data:
Get-up attack
Invincibility: Frame 1-9
Hitbox1:
Hitbox Out: Frame 20
Hitbox End: Frame 22
Hitbox2:
Hitbox Out: Frame 26
Hitbox End: Frame 28
Move End: Frame 50
Ledge Get-up attack (Below 100%)
Invincibility: Frame 1-24
Hitbox Out: Frame 25
Hitbox End: Frame 28
Move End: Frame 56
Ledge Get-up attack (100%+)
Invincibility: Frame 1-45
Hitbox Out: Frame 40
Hitbox End: Frame 45
Move End: Frame 70
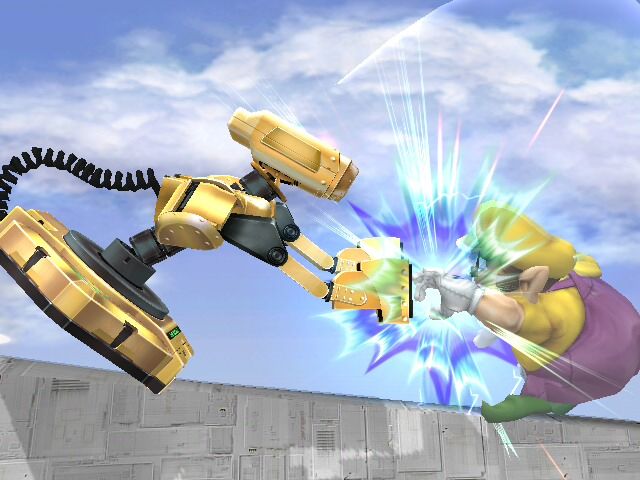
Every character has a total of 4 different get-up attacks: Ledge attack, 100% ledge attack (a stronger one), regular get-up attack (when you don't tech the floor), and a trip attack (get-up attack when you trip)
TiltsMuro said:* Ledge attack - R.O.B. leaps onto the edge and swings both arms over-head. 7%
* 100% ledge attack - Rotates so that his right arm is directly pointing the stage and lunges his right arm forward. 10%
* Floor attack - Quickly gets up and spins with both arms extended in each direction. 6%
* Trip attack - R.O.B. lowers his torso, withdraws it's left arm and extends it's right arm to sweep the floor around. 5%
ROB has some of the most useful tilts of any character in Brawl. He can juggle, space, and trip > whatever.
Forward Tilt (Ftilt) 6% sweetspot, 5% sourspot
Frame Data:
Hitbox Out: Frame 7
Hitbox End: Frame 10
IASA: Frame 30
Move End: Frame 32
ROB's arm looks almost like a hook, but the effect is quite the opposite. The Ftilt sends the opponent outward in more of a horizontal range than vertical. It leads into more Ftilts, dash attack, SH Fair(s), just about anything.
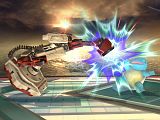
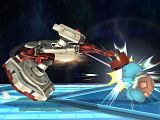
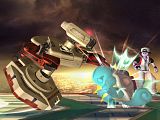
Wolydarg said:Ftilt out-ranges Marth Fsmash and the first hit of snake Ftilt, but extends your hurtbox so if you whiff it you can be punished.
Up Tilt (Utilt) 9% 4 FramesMag!c said:Forward Tilt:
ROB's F-Tilt is useful as a keep-away tool due to it's good priority and reach. Many characters are frustrated by navigating through ROB's projectiles, only to be met by a well timed F-Tilt that begins the process of approaching all over again. It also serves as a good poke and weapon to gain some breathing space. Note that a perfectly spaced F-Tilt will hit Game and Watch out of his B-Air, demonstrating it's usefulness in closing down aerial approaches. It is also a good alternative followup to the D-Tilt [trip] if you would rather send your opponent across the stage instead of up.
Frame Data:
Hitbox 1:
Hitbox Out: Frame 4
Hitbox End: Frame 6
Hitbox 2:
Hitbox Out: Frame 6
Hitbox End: Frame 9
IASA: Frame 27
Move End: Frame 38
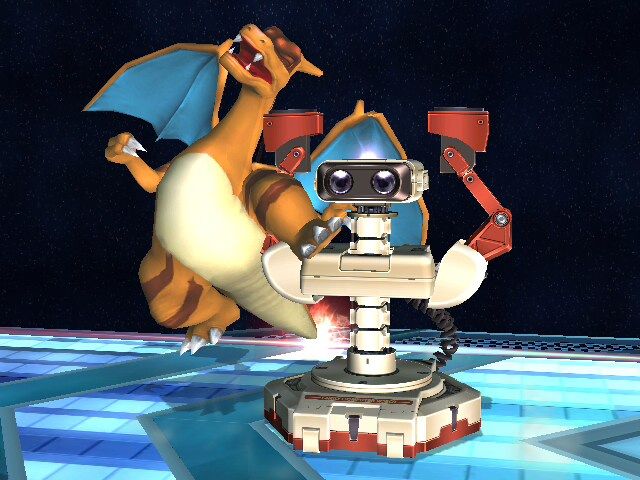
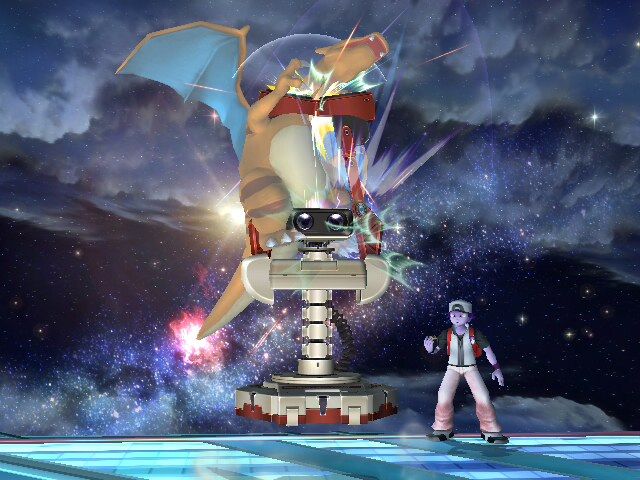
ROB raise his hands in a "The roof! The roof! The roof is on fire!" -esque manner. This has two different hitboxes. The outer one does very little damage and knockback, but it sucks your enemy in. MEANING, if they DI wrong, it looks like an infinite. The other hitbox is the middle of ROB, it has low knockback and sends the opponent up; they string together a low-mid percents and lead into Usmashes, Uairs, whatever in the air.
Down Tilt (Dtilt) 5% 3 Frames
Frame Data:
Hitbox Out: Frame 3
Hitbox End: Frame 4
IASA: Frame 15
Move End: Frame 26
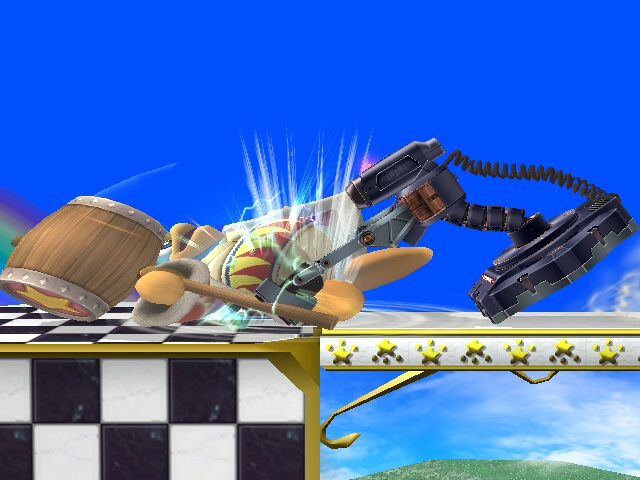
This move is godly. For one, it trips. That means you can do something like "Dtilt x amount of times to trip > Dash attack/grab/Ftilt/Fsmash, whatever! Also, this move leads to an infinite against walls. And on stages with ceilings on the wall (Luigi's Mansion) or if they miss a tech, you can Dtilt lock them about 3 times until they leave range and follow up with whatever you want (See the Dtilt string a few lines up). All that and it's godly fast.
Mag!c said:ROB's D-Tilt comes out very quickly, and serves as a sort of poke at the legs. The animation is that ROB will sort of look at the opponents feet and thrust both arms quickly at the opponent's kneecaps. This move is a good choice for many reasons- for one it's very fast. The low damage is offset by the speed at which it comes out, often letting you land a second D-Tilt if the second trait does not come into play. This second trait is that it often trips the opponent. I cannot stress enough that you must not mindlessly spam D-Tilt. This is because if you do and the opponent trips, you will sometimes waste the golden opportunity to land a more powerful attack by just D-Tilting them again. There are several followups to a D-Tilt, such as F-Tilt to get some distance, and D-Smash to rack up some damage and throw them in the air. A good tool to poke at your opponent and create opportunities, but one that must be used carefully.
Smashes
ROB's smashes aren't the best in the game, but they are pretty good. His Dsmash can rack damage, his Usmash can kill, and his Fsmash is a hybrid, it can kill or rack damage (just not as good as his other ones)
Forward Smash (Fsmash) 14% (19% fully charged) 13 Frames
Frame Data:
Before Charge: 10 Frames
After Charge: 3 Frames
Hitbox Out: Frame 14
Hitbox End: Frame 16
Move End: Frame 40
ROB shoots out his laser at short range for a semi-powerful blast. This move has a disjointed hitbox and makes for a good damage racker or kill move (Just decide on which one before you start using it so you don't end up with decayed kill moves). A good time to use this is to follow up a glide toss with this (covered later on). This smash can be angled up or down to hit those that normally aren't hit easily by this move, like Ness and to hit those with weak shields (angle down) or on platforms (angle up). This move does have some warm-up lag though, so if you're in a tight spot, go for something like a jab/Dtilt/Dsmash.

Up Smash (Usmash) 14% (19% fully charged) 12 Frames
Frame Data:
Before Charge: 8 Frames
After Charge: 4 Frames
Hitbox Out: Frame 13
Hitbox End: Frame 18
Move End: Frame 56
ROB flips his body 180 degrees and shoots a burst of rocket fuel from his jets. This move does identical damage to the Fsmash and does it in one less frame. However it also has more knockback than the Fsmash does. Unfortunately this move has a very small hitbox horizontally. What does this mean for you? It means that it's very difficult if you want to Usmash a grounded opponent. On characters like Squirtle, Ness, don't even try it, but on DDD, Bowser, DK and other large heavies, it can hit them without too much difficulty (Be careful you don't get shieldgrabbed though!). This move kills fairly early and can make up for a decayed Nair.
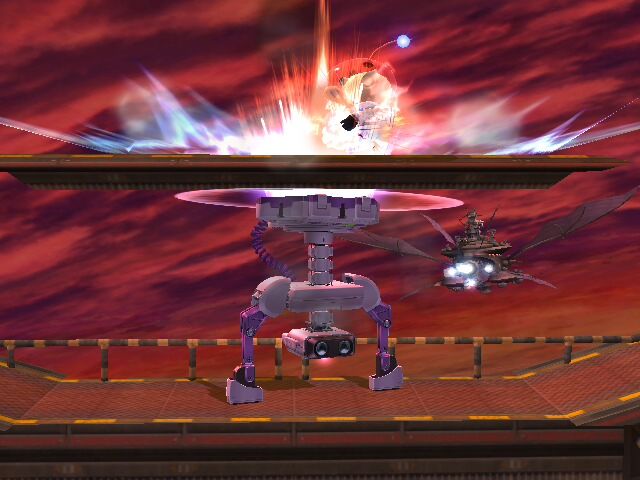
Down Smash (Dsmash) 13% (18% fully charged) 4 frames
Frame Data:
Before Charge: 2 Frames
After Charge: 1 Frame
Hitbox Out: Frame 4
Hitbox End: Frame 16
Move End: Frame 37
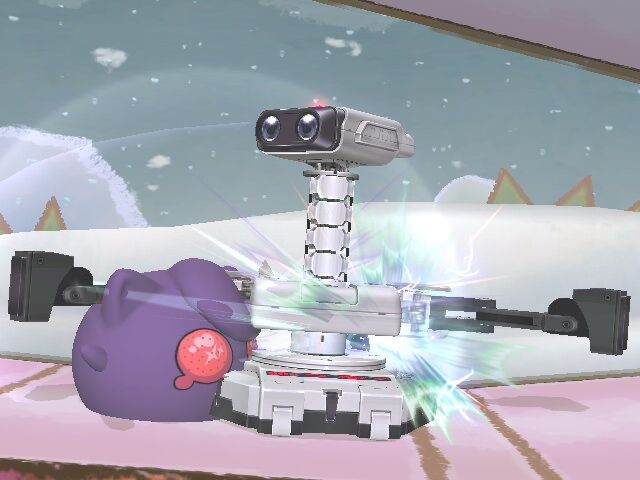
This move is even more godly than his Dtilt. ROB drops his arms and spins quickly racking damage. This move isn't really a killer as it is more of a damage-racker. You can use this OoS (Out of Shield), after the ever-hated Spotdodge>Dsmash, and after a glide toss. This move will definitely be decayed almost all the time unless you die or go on an aerial string. This move is (S)DI-able, but a lot of the time this is good for you as you can just Dsmash them again.
Mag!c said:ROB lowers his arms and spins rapidly with them outstretched for multiple hits and to send his opponent in the air. This move is quick, and often will be stale as hell before the match is over. It deals excellent damage, comes out extremely quickly, and is a useful weapon all around. If your opponent is of a certain quality, they will SDI upwards out of it, so the move is not infallible. Another negative is that it is rather punishable if the opponent correctly shields it, so don't spam the D-Smash as a safety net. Rather, use it as an excellent punish, followup from a Spot-Dodge, and to surprise your opponent at close range.
Grabs
ROB's grabs are very good. One would think they aren't too special, but there's one very important fact about ROB's throws: They can KO.
Standing Grab
Frame Data:
Grabs on frame 6, ends on frame 29
This is ROB's basic standing grab. It comes out fairly quick as opposed to the running grab (9 Frames).
Running Grab
Frame Data:
Grabs on frame 9, ends on frame 39
ROB's running, slower grab. However, if you press shield then A (or whatever your attack is set to) you can do a running, standing grab and grab at 6 frames.
Pivot Grab
Frame Data:
Grabs on frame 10, ends on frame 35
This is ROB's slowest grab, and unfortunately for him, it isn't as useful to ROB as it is to other characters. This is done by pressing Z (or whatever your grab button is) and back at roughly the same time and you'll do a running grab, but grab backwards at the expense of 1 more frame.
Pummel 2% each hitWolydarg said:ROB's pivot grab is a bit slower, but has more range, that is key.
Frame Data:
Pummels on frame 2, ends on frame 19
This is ROB's only attack while holding an enemy other than throwing. At higher percents it's usually a good idea to pummel a few times then throw so you can kill sooner. Of course, you can always keep pummeling until he/she grab releases then follow up however you want.
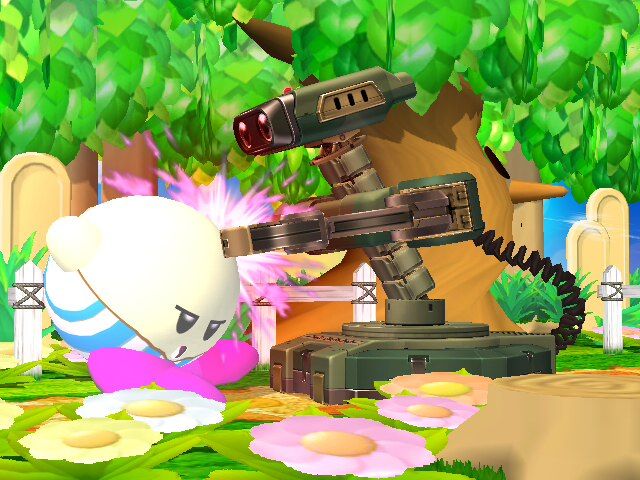
Forward Throw (Fthrow) 10%
Frame Data:
Throws in 2 Frames, ends on 22
A very straightforward throw. ROB just throws the opponent forward. It's not very good for KOs until 140+ on the majority of the cast.
Mag!c said:ROB's F-Throw does not look like anything special, but there lies it's beauty. It is good for supplanting the opponent's "rhythm" with your own, that is- it is good for taking back the initiative from your opponent. The animation for the throw is almost nonexistent, sending them flying with a quick 10%. From here you can follow up with a laser and your camping game, or push forward to try and press the initiative. The last option is particularly relevant when the F-Throw puts them off the ledge, presenting the opportunity for a gimp. Overall it is a solid tool that you can use to mix up your throwing game.
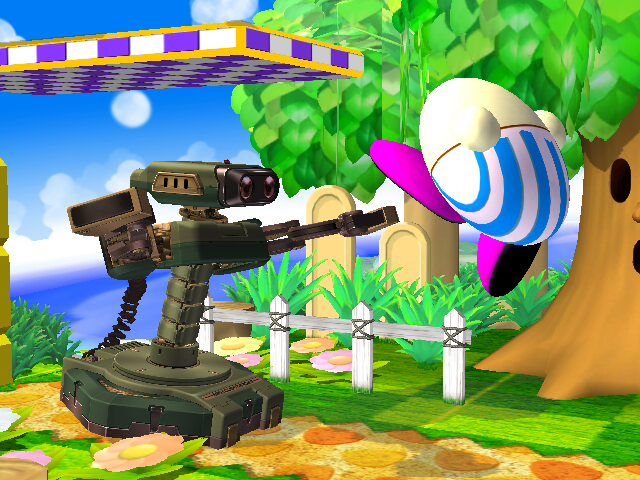
Back Throw (Bthrow) 10%
Frame Data
Throws on frame 5, ends on frame 25
Essentially the same as the Fthrow, except that it's a little more powerful; it's great for getting horizontal kills at the edge of stages like Smashville.
Mag!c said:ROB's B-Throw is extremely similar to his F-Throw, that is- ROB will turn around and perform the same almost nonexistent animation to throw them. The difference is that ROB's B-Throw kills a bit earlier, making it useful if kept fresh on stages with closer edges. As said with F-Throw, B-Throw is useful for quickly taking the initiative back, or giving yourself some breathing room and a little time to think. It's quickness and relatively high strength in killing as far as throws go make it a useful tool.
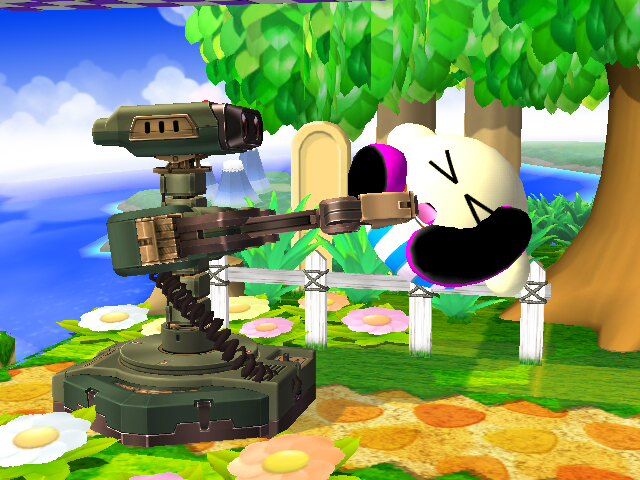
Up Throw (Uthrow) 10%Frame Data:
"Throws" on frame 65 (does damage), ends on frame 91
This is another one of ROB's throws that can kill. I personally always save this in the case that I can't get a regular (Smash, gimp) kill. Around 120%, characters start dying, however I've seen a Dedede survive a Uthrow at 200% before, so don't be dependent on it. Also as a side note, around about 50%, this move starts having no reliable follow-ups except predicting their pattern for a Uair/Nair. BUT, at that point is when you should save your Uthrow and start using Dthrows so that you have a follow-up AND you save Uthrow just in case your kill moves are staled.
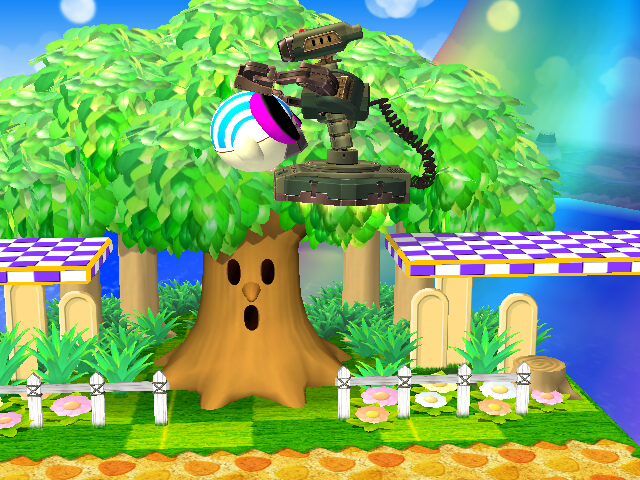
Down Throw (Dthrow) 10%
Frame Data:
"Throws" on frame 50 (does damage), ends on frame 65
Yep, this one does 10% too. This move is great for setting up your opponent for a Uair which can do 19% undecayed. At low percents, there's a very small windows to get out before the Uair hits, and even with a bit of mindgaming, you can Dthrow to Uair at high percents. You can also follow up with Utilts or a Usmash if can predict the air dodge.
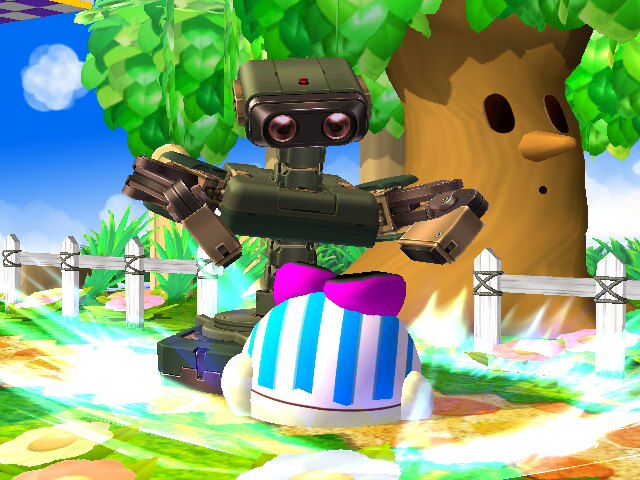
Aerials
Forward Air (Fair) 10%
Frame Data:
Hitbox Out: Frame 7
Hitbox End: Frame 17
Move End: Frame 32
Autocancel?: Frame 24
Landing Lag: 12 Frames?
ROB acts like a pansy and sissy-slaps the opponent. Sissy as it is, it strings together very well. This will be one of your most used aerials.
Mag!c said:It will also cancel out certain projectiles and has good priority and speed, making it a good approaching and keep-away tool. Furthermore, similar to Marth, ROB can perform two F-Airs out of his short hop- as long as you don't remain predictable, you can use this to catch opponents with their pants down, or short hop a F-Air with enough time left to pick a more suitable option.
Wolydarg said:Fair = MAD disjointed. It beats Meta Knight's GLIDE ATTACK. Hit box for this attack is quite large, and stays out for a fair bit
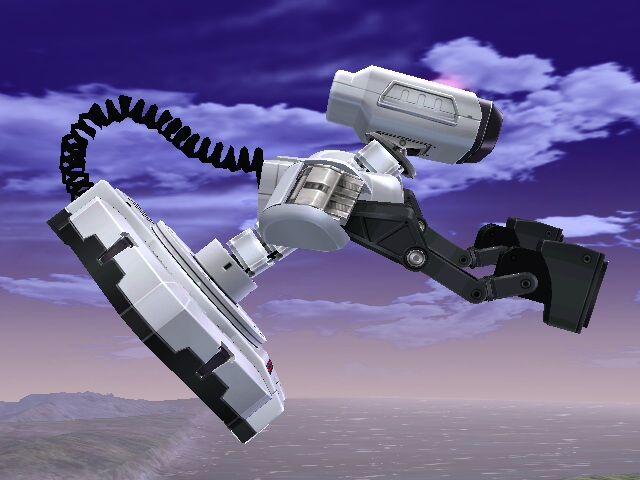
Back Air (Bair) 11%
Frame Data:
Hitbox Out: Frame 11
Hitbox End: Frame 26
Move End: Frame 40
Autocancel?: Frame 26
Landing Lag: 12 Frames?
This is one of ROB's best spacing moves for the fact that it automatically spaces. When you use the Bair, not only does it deal one of ROB's best killing moves, it's also one of ROB's most unpunishable moves because it pushes you forward when used. It can also be used to recover. (ie. Hit by Lucario's Fsmash and on the side of the stage, after momentum canceling, Bair you're way back to the stage, double jump, and you recovered without wasting fuel.)
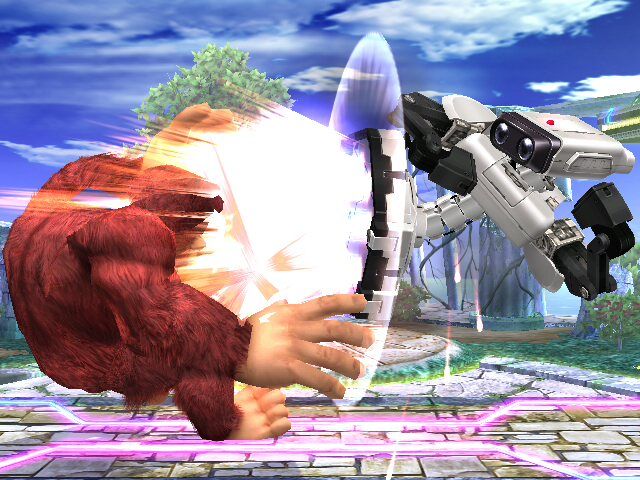
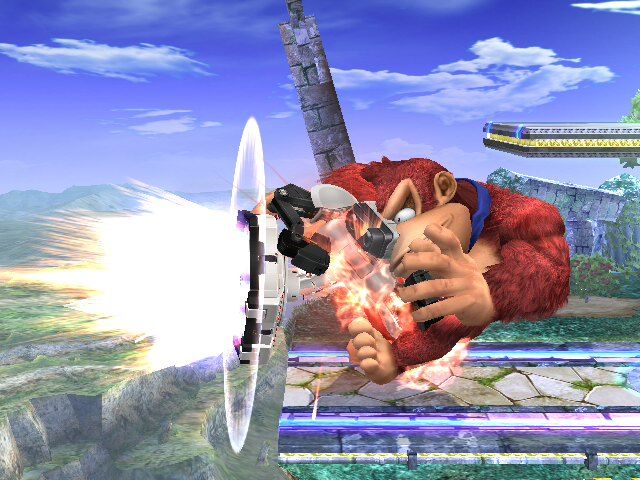
Up Air (Uair) 24%
Frame Data:
Hitboxes Out: Frame 7
Hitboxes End: Frame 27
Move End: Frame 53
Autocancel?: Frame 36
Landing Lag: 22 Frames?
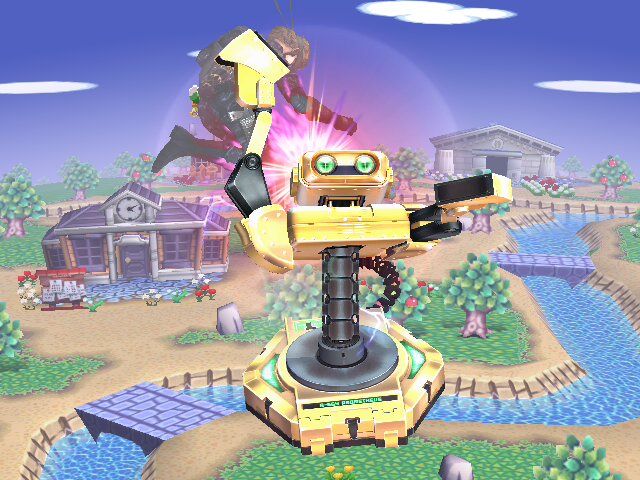
This is ROB's most damaging move along with the Robocopter but more viable. ROB basically just swings his hands over him for massive damage. This move is rather useful after a Dthrow or Utilt for an easy 30% or so. If you hit with every single hit of it, it can do between 19%-24% depending on how many sweetspots you hit (which are near the 'triceps' of ROB)
Mag!c said:Up-Air
ROB's U-Air is a powerful damage racker. It comes out quick, has a bit of a hitbox to the sides, but of course points primarily upwards. ROB swings his arms very quickly several times for a multi-hit attack that can deal 30% in total! Note that there is no mythical sweetspot or part of the aerial that you will have to strain to land. So long as they are directly above ROB, 20% or more is relatively easy. This makes it great for following up from a U-Tilt, punishing people above you on platforms, or predicting your opponent after a D-Throw. With it's strong percent racking potential and priority, ROB's U-Air is an extremely useful tool for delivering pain on meatbags.
Down Air (Dair) 11%
Hitbox Out: Frame 20
Hitbox End: Frame 25
Move End: Frame 70
Autocancel?: Frame 27
Landing Lag: 21 Frames?
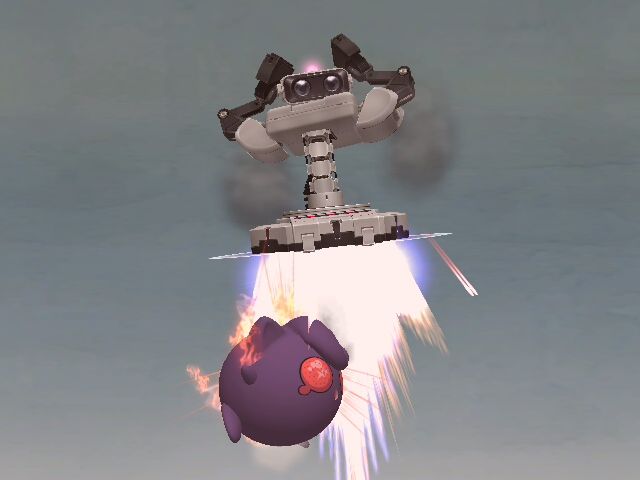
Excluding his projectiles, this is ROB's slowest move. However it's also arguably the strongest in terms of hitstun and his only Meteor Mash (Spike). Since it's very slow, you need to predict where your opponent will end up while recovering as that will usually be the only time you're using this as an attack. This thing can kill at extremely low percents (30-40%) on light characters.
Neutral Air (Nair) 10% 18 Frames
Hitbox Out: Frame 18
Hitbox End: Frame 33
Move End: Frame 48
Autocancel?: Frame 33
Landing Lag: 12 Frames?
This is ROB's weakest and slowest (excluding the slow-*** Dair) aerial. Despite that flaw, this move has amazing knockback and is one of ROB's main killers. That doesn't mean that it has to be a kill move though, just as long as you keep one kill move fresh at all times.
Mag!c said:N-Air
While a strong kill move, ROB's N-Air is also a great punishing weapon. At first ROB points his butthole forward a bit, and then spin in a 360 with a big burst of "jet fuel" (Oh ho ho) that not only has a disjointed hitbox, but has great knockback! There are two ways you can go about using your N-Air. The first is to use it as your punish, meaning it will be rather stale. In this case you will rely on edgeguarding, the B-Air, and the U-Throw as your kill options. The second is to save it for crucial kills. This is recommended in matchups where getting that kill is crucial, such as Lucario. Overall this is one of ROB's strongest moves and is to be used like a valuable resource.
Specials
Neutral B (Laser!) 5%-16% (A VERY VERY LARGE SECTION WILL GO HERE AFTER I GET THE SKELETON DIAGRAMMED OUT FOR THE WHOLE GUIDE!)
Frame Data:
Starts firing (Candle Beam part hits) on frame 25, ends on frame 55
Laser speed frame testing! I had a Bowser stand on the opposite side of Smashville (neither of us on the platform) and myself on the other end. This is comparing the speed of the weak laser and the strong laser.
Weak Laser hit in 31 frames
Strong Laser hit in 39 frames
This is ROB's slowest move but also one of his best. This move has three (3) variations.
1st- ROB's 'empty' laser. This does 7% of damage. Basically, this is ROB's Fsmash poser; the laser is run dry and ROB just shoots a spurt of energy. This is your least used stage of the laser.*(T.R.D.S.) said:Properties
*Cannot be spammed
*Has three power stages
*Can be angled up or down
*Every level, except the weakest one, pierces through opponents
*Every level, except the weakest one, can bounce off obstructions, but will weaken as they do so
*The [super charged laser] can cover the whole horizontal distance of any stage, extending into the Blast Line areas, and is a viable kill move
*Each one of the levels has the ability to deal flame damage and knockback if the opponent comes in contact with the hitbox surrounding ROB's head. On the higher two levels, this will usually lead to the opponent being knocked into the actual laser for MOAR damage and knockback
*(T.R.D.S.) said:Candle Beam: I call this the Candle Beam because the hitbox deals flame damage, and reminds me of the flame of a candle. Anyways, this is the Robo Beam if used directly after another laser shot or if charged for less than three seconds. This level is actually present in all the stages; it's that fuzzy, orb-y area of the laser in front of ROB's head.
RANGE: One character space.
ADVANTAGES: Surprising damage and knockback. Excellent option if the opponent is All Up In Yo Face. A very situational kill move.
DISADVANTAGES: Extremely short range, very hard to hit with.
DAMAGE: 7%.
KNOCKBACK: One fourth of Final Destination.*
*NOTE: Knockback was tested on a normal weight character at 0%., and since the weights vary greatly between different characters, take the knockback with a grain of salt.
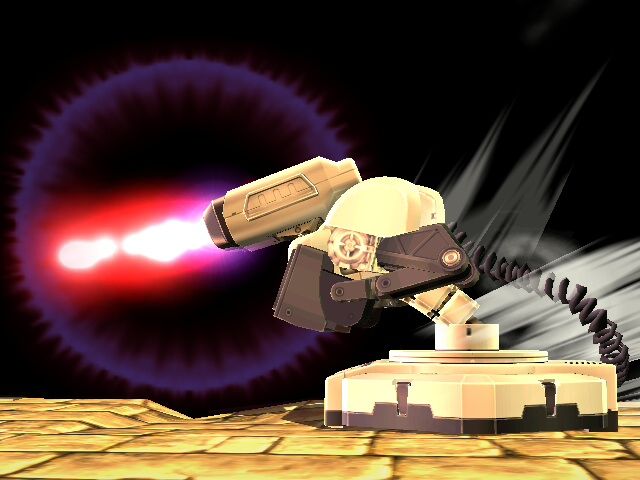
2nd- ROB's weak laser. This does 5% if hit by the laser or 12% at point blank range. This is [probably] going to be your most used form of this laser
Technically, this is ROB's most damaging move along with Uair. If only one strike hits, it will do a measly 2%. However if you're opponent is bad at DI'ing, they will take a whopping 24%. This isn't to say that this move is good, because it is not. It has a lot of startup lag and cool down lag, it's very easy to DI out of and because of the lag, it's easy for your opponent to get a counterattack in. It can also be shield-grabbed. This move is also a reflector. However, because of the lag involved, it's really only useful at long range against characters with strong projectiles, like another ROB, Samus, Lucario, you get the gist.side B can be described like this
side B is like a town drunk who runs around yelling about all the things he can do (in this case reflect, attack, momentum cancel) but everyone knows that this is just the drunken yelling of a man who can't really do anything.
another way to look at it is
side B is a good meaning town fool. he tries to help you out (reflect, attack, momentum cancel) but in the end will just get in the way.
Down Special (Gyro) 5%-18%
Frame Data:
Frames to fully charge: 107
Frame number uncharged gyro hits on: 21
Number of frames the gyro hits on after being fired (the input for releasing the gyro, when the gyro is on the stand and ready to be fired): 6
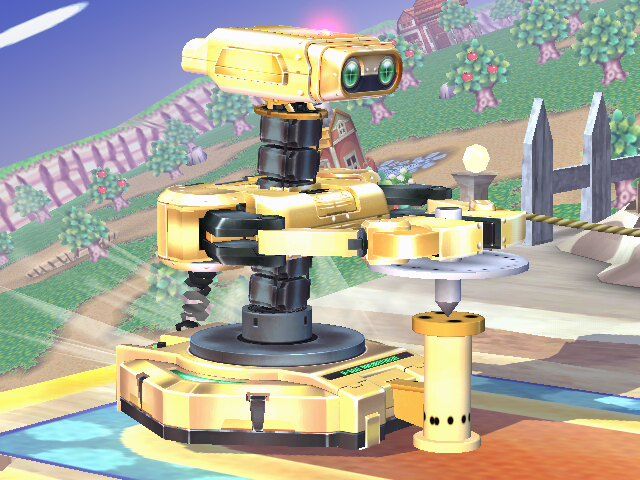
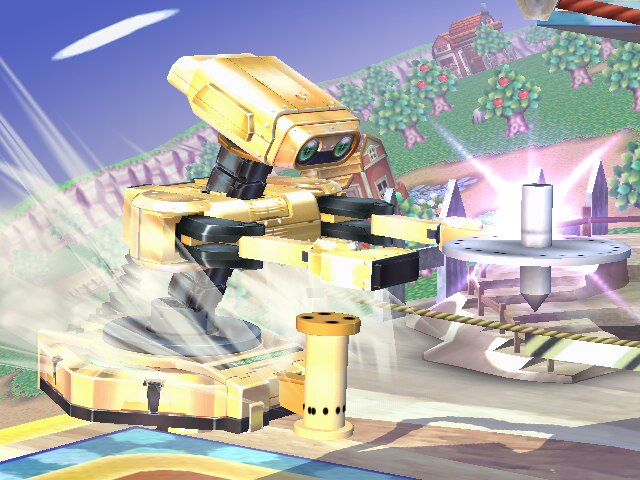
This is one of ROB's if not his most versatile move. This move does 7% if shot without charging and comes out in 21 frames, 18% if shot when fully charged, 9% if thrown as an item, and 5% if hit while it's spinning on the ground. ROB has many options while having a gyro. He can glide toss forward/backward and throw it in any direction, jump-cancel throw it so he can have a shorter glide toss and dribble his gyro if needed while having all attacks still available. It can be normally thrown, or even edge-hogged (click here, first one at 0:34).
DuLL RaZer said:Gyro Stuff:
*credit goes to Zastrozzi's OLD thread on this for most of this data
There are three states that the gyro can be in once it is in play in the field:
1) Spinning, where it is on the ground but still quickly rotating from the charge.
2) Wobbling, where the momentum of the charge is dying down causing an abnormal rotation, and finally;
3) Sitting, where the gyro has stopped spinning and is laying idly on the ground.
Regardless of the state, the opponent can pick up the gyro and use the item as their own- but it is considerably more difficult to do when it is in any other state but Sitting. Based on the state, and charge level, it remains in play for different periods of time. The data I’ve gathered through some independent research and testing by others indicates that there are multiple charge levels, but I am too lazy to test to get the data on the others, and there isn’t any readily available.
Minimum Charge
5 seconds total existence
----->1 second spinning
----->2 seconds wobbling
----->2 seconds grounded
Maximum Charge (3 seconds)
8 seconds total existence
----->3 seconds spinning
----->3 seconds wobbling
----->2 seconds grounded
->The time starts when the Gyro finishes bouncing along the ground. If you pick it up, the count will continue.
->If something is hit during the initial toss, the count can start early.
->The gyro does not disappear until it comes to its sitting state on the ground, so you can infinitely toss it and catch it in the air and toss again. However, if the gyro hits a shield, it simply disappears.
->Also during the toss, every time the gyro bounds along the ground, it loses 2% damage.
----->At full power, it deals 19%. After it touches the ground, it deals 17%, then 15% etc. The least damage it can deal is 5%.
->The gyro does appear to stale. A full charged gyro does 19% damage. Another one, immediately after it, both chars in the same spot, deals around 17% damage.
III. Advanced Techniques
The Glide Toss

tl;dr: ROB cancels a roll with a throw of an item which results in a glide animation which puts ROB in the perfect position for a grab, attack, whatever if the item hits.Mag!c said:(As taken from the Comprehensive AT List in the Brawl Tactical Forum)
Glide Tossing
How to Perform: Initiate any roll while holding an item, then throw the item before the roll animation begins. You can use the C-stick to throw the item in any of the four cardinal directions instead of just pressing A for a forward throw.
Effect: Character slides in the direction of the would-be roll and tosses the item. Distance traveled differs based on character and several other factors. See "In-Depth Analysis" link for variations and distances.
OP:http://smashboards.com/showthread.php?t=141858
Analysis: http://www.smashboards.com/showthread.php?t=154982
Distances List: http://www.smashboards.com/showthread.php?t=172861
The Glide Toss an extremely useful AT for ROB. For one, he has the most practical distances for his Glide Toss, and he provides his own item for it to boot! Let's cover the options on a case by case basis.
The Forward Glide Toss- Out of this you can F-Smash for a surprise distance kill. You may also D-Smash to pressure a shield or punish a spot-dodge on the thrown Gyro. You can also short hop an aerial to surprise them- the Forward Glide Toss is useful for applying pressure quickly, letting ROB move from point A to point B with surprising speed.
The Backwards Glide Toss- The standard retreat for ROB is the Backwards Glide Toss to Laser, catching an approaching opponent between the two projectiles. Mostly the Backwards Glide Toss is useful as a quick retreat to gain some breathing space.
DuLL RaZer said:On the subject of glide-tossing, there is a boat-load of stuff to do/follow up out of it. For a "uniform" approach, and as a way of not typing so darn much, I'll use this format.
ROB= : The direction ROB slides in.
G=: The direction the gyro is thrown.
ROB= (x,y): Where x is the direction ROB is facing before the slide, y being the direction of the slide. f=forward (direction he was facing). B=backward, (opposite direction he was facing).
G(a)= Direction gyro is thrown. f= forward, b= backward, u=up, d=down
ROB(f,f)G(f)->
Typically used as an offensive maneuver, as an approach or to end a string of moves. Notice the ----- line, as anything below this would be considered "advanced", or at least substantially more difficult.
Dash Attack (can be strung into an F-smash at lower percents)
F-smash (good low% combo and possible KO option)
U-smash (against heavies at lower percents, or if they SH over the throw)
D-smash (good to take advantage of whittled away shields, especially at lower percents, as you can "combo" out of it.)
Jab
D-tilt (can cause a trip)
F-tilt (can chain into a dash attack which can chain into an F-smash (may need to forward stutter step it)
Grab (good if they shield the gyro)
F-air
U-air (good if they jumped over the gyro, or are in the air and you want to get under them really fast)
Laser (good if the opponent is hit with the gyro, and you can't follow up with anything else. Can lead to KO's at high percents due to a similar "b-throw to full laser" effect)
---------
RAR'd B-air
Up+B (good if they are sent off-stage and you want to move directly into an aggressive edgeguard)
Pivot Up+B (good of they are sent off-stage and you want to move directly into an aggressive KO attempt with B-air)
Pivot Grab (if they rolled through the gyro hit or shielded the entire thing, very much dependent on the position of the chars. Works best when the GT is initiated *close* to the opponent, and the glide puts you behind them)
Pivot F-Smash (again, good if your GT has put you behind them; simply dash->pivot->(optional backwards StuterStep) F-smash)
ROB(f,b)G(f)->
Typically, used as a retreat
Laser (a good, solid retreat)
ROB(b,b)G(f)->
D-smash (if they are behind you before you GT)
F-air (if the glide sent you past them)
F-smash (if glide sent you past them)
U-Smash (if you predict *perfectly) where they will land, if they are in the air when you GT)
SH N-air (if they are far enough behind you where you can SH and N-air, which isn't as hard as it sounds, since the N-air 'starts' behind you.)
SH B-air
SH U-Air
Up+B-> (if you have passed them)
---------
Pivot up+B (if you have not passed them)
SH Reversed Laser (if you have not passed them)
Wavebounced Laser (if you have not passed them)
ROB(f,f)G(d)->
D-smash (works if you are near the opponent before the glide if you want to hit with gyro AND D-smash, doesn't matter where if you want to hit with just the D-smash)
Most of from the list of ROB(f,f)G(f)->, which are *not* dependent on the opponent being sent flying, especially grab, jab, U-smash on heavies, d-tilt. Practically anything from the aforementioned list... just be aware of what happened to your opponent, sent flying, popped slightly up, shielded, etc.
ROB(b,f)G(d)->
Practically the whole ROB(b,b) list, depending on where the glide puts you, if the gyro hits, etc.
ROB(f,f)G(u)->
Used mostly as a means to catch an opponent with the gyro who is in the air. Don't make it a habit, as they can/will airdodge to catch the gyro.
U-smash (low percents, or if the G(u) doesn't hit them, but the slide brings you underneath them)
U-air (same as U-smash, but works just as well if the gyro hits them)
Up+B into... (works similarly to U-air, good for setting up rising aerials for a possible KO)
I'm not really going to go into any more in-depth detail, as most of the other facing/glide/gyro toss combinations have available to them several things from other lists, just with minor adjustments. Practice them on your own!
Misc Glide Toss Stuff:
D-Tilt Lock Set-up; Can be used to set-up a D-tilt lock either by chasing them down *after* a gyro hit, or using the toss to chase them down.
Glide-Hugging (mentioned before)
Additional Follow-ups; don't think you are limited to "gyro->move". Depending on the situation (opponent, percent, where you wound up after your glide, whether the gyro hit them) you can follow up with multiple things one after the other.
Ex: ROB(f,f)G(f)->Grab->Pummel->D-throw->U-air.
Pivot Glide Tossing
I was foolin' around one time in training mode with the whole "pivoting smashes" where you dash one way, then dash the other, and cancel the Dash with a D- or F-smash (similar to stutter stepping, but... more 'prolonged', for lack of a better word), and thought that if I can cancel into a smash, why not a glide-toss.
So, you get a gyro in hand. Dash toward or away from the opponent, start a dash toward where you were before, and glide toss. It is important to note that you have to glide in the OPPOSITE direction of where you are heading for this to work properly.
So: Gyro in hand, facing left->dash right->dash back to the left->glide toss so that ROB glides back to the right. The gyro can be thrown in any direction.
The main appeal of this, is that it now adds some "surprise" to your glide toss. A lot of intermediate level ROBs will roll, or dash to a certain point away from the opponent and then glide toss, or will immediately glide toss- which a good opponent will see coming after a few times, rendering it a lot less effective. With this, you keep them guessing once you have a gyro in your hand. "Ok, he's dashing away. He's gonna stop, shield, and toss. OH NOES! WHAT?!" or "Ok, he has a gyro, expect a... why is he approaching me?? *grab attempt that fails because you dashed the opposite way* Gawsh, my grab missed. *glide-toss to the face*
...Somethin' like that.
Super Robo-buster
Sometimes called the Megaburner, this AT extends the duration of ROB's UpB recovery. When recovering normally with ROB, you press UpB and hold B/up. This goes pretty far, but if you tap B repeatedly instead of holding it, the duration will just about double. This is useful for stalling, and preventing being gimped. I use it most when against good edgeguarders so that I can wait for an opening before approaching.Click here to see how the Super Robo-buster works.
GlideHugging
Click here to see how it in action: http://www.youtube.com/watch?v=fa8EMDBPjQ0DuLL RaZer said:As we know, a ledge cancels the gliding animation during the glide toss. Being near the edge, you can buffer a dash & quick ledgegrab out of the glide toss' glide (only works with your back to the ledge, gliding backward). The result is dropping the gyro onto the stage, sliding a bit away from it, and directly into a ledgegrab.
If you are getting pressured toward the edge, but don't want to risk just turning tail and snagging the ledge, its an option to give you some room. Works well against chars you want to be on/near the ledge against (DDD, Falco on FD, etc).
Reverse Gyro

Normally ROB is facing front when he uses his Down B, but if you press Down B and IMMEDIATELY press backwards, ROB will turn backwards while charging OR shooting his gyro. This works in the air and on the ground. Along with Gyro cancelling (see below), this can be a quick turn around move like Mario's Cape or Fox's Shine.
Gyro Canceling

Gyro Canceling is canceling the gyro animation right after initiating the gyro charge. This ONLY WORKS WHEN THE GYRO ISN'T CHARGED. What's good about this normally (when not canceling), ROB has to airdodge to cancel his gyro, which takes a bit of time to do. Mixing up regular canceling with gyro canceling will keep your game fresh and unpredictable. Possible follow-ups are: Anything that works in the air, bro.
Speed UpB
This AT is fairly new; The Speed UpB is when you glide toss and before the momentum from the slide is finished, ROB hits the end of the platform he is on. At this point, ROB UpBs (Reverse UpB and wavebounced work just as well) and he keeps the momentum from his glide toss and carries it offstage through his robo-buster. It's use is highly situational, but it can be used to spike the opponent or bair/fair them while they're offstage. While untested, it's safe to assume the weak glide toss will send ROB a shorter distance. This is another leg to support ROB's already stable gimp game.180_____________________0
The angle ROB goes during the Speed UpB is around 25-40 degrees approximately. Take this into account as this can't be used to gimp those recovering below the stage.
(Animated .gif pending, if anyone will make one, please PM it to me)
DTilt Lock
ROB's DTilt is one of the many moves that have a special property that make the opponent "flop" on the ground when hit. Basically, if the opponent is lying on the ground from not teching, you can DTilt them and they'll flop and remain laying down for another one. This can be done against a wall until higher percents (~120%) before you need to finish it.
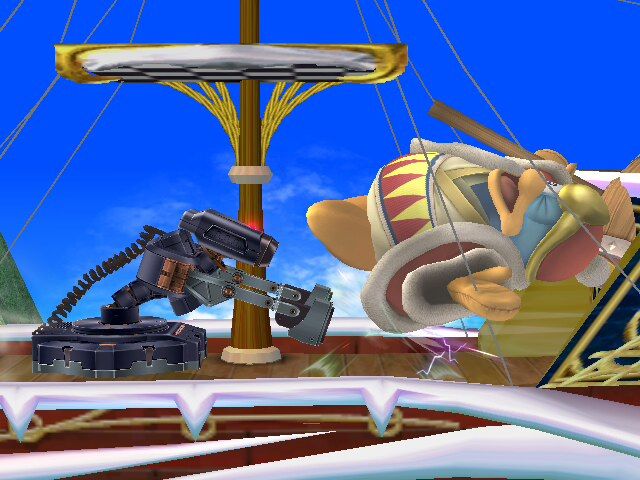
Wolydarg said:Dtilt lock > 3 times in succession. Take a step forward after each Dtilt, time it right you can go ALL the way across the screen into a Fsmash to get them off the stage. Since Luigi's mansion is banned here, the most frequent time I see this is: Usmash hits their shield while they're on a platform, they fall, don't manage to right themselves/tech, and you get a Dtilt lock, which refreshes all your moves (except Dtilt), racks up percentage, and gets them off the stage for edgeguarding. Definitely worth learning the timing for Dtilt lock.
Boost Smashing
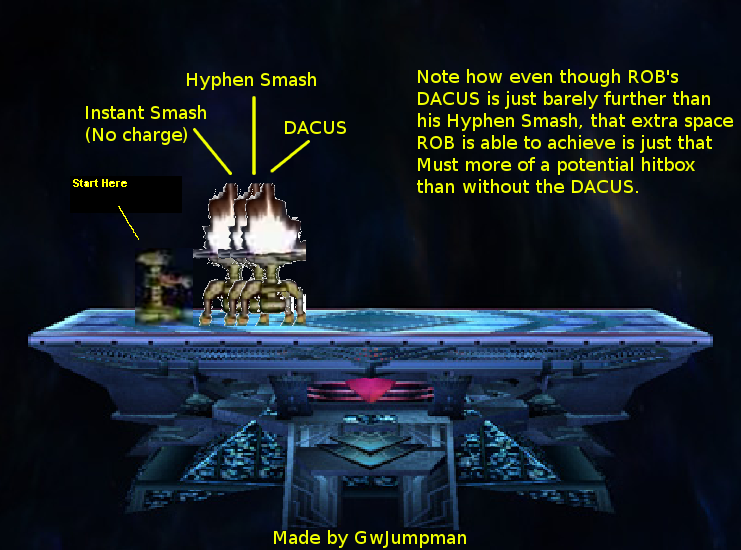
Boost Smashing, also called a DACUS (Dash Attack Canceled Up Smash), is when you initiate a dash attack (Dash and press the standard attack button) then cancel it by Usmashing. The momentum from the dash attack carries over to the Usmash and makes the character slide. Good Boost Smashers are Link, Wario, and Snake.
7-7-09 - I did some testing after friendlies with *(T.R.D.S.) and found out the when done with the correct timing, ROB's DACUS goes just a bit beyond the Hyphen Smash. What's this mean to you? It means you now have three different ranges for USmash.
1. Running and C-Sticking Up without charge
2. Hyphen Smash
3. DACUS
The DACUS goes the farthest, while the C-Stick smash goes the shortest.
Rising Aerials with Robo-Burner:
DuLL RaZer said:This is pretty basic, and as such every ROB should know how to do it, and when to do it.
Simply put, you can use the Robo-Burner to increase your height during aerials. This enables you to hit opponents that might have been out of range for whatever aerial you desired.
Performing this is super easy:
1- Initiate your up+b
2- Follow your opponent using your up+B
3- Start your desired aerial
4- Hold up on your control stick
Ex #1: You f-smashed your opponent off the stage after a glide-toss, but it didn't kill him. He DI'd properly and is now near the top corner of the map, out of reach of your "run off the stage->Jump->Aerial" and your "Run to the Edge-> Jump-> Double Jump->Aerial". Most characters would be stuck, having to wait for their opponent to come to them. However, by using a rising aerial with the Robo-Burner you can chase them, and N-, B-, F-, U-air them from below for the KO.
Ex #2: Your opponent is below you, off the stage, and is primed for a spike. However, that particular character has a good U-air that normally would beat out your D-air. By using a rising D-air, you can pull off the spike while moving away from them and skip the "bounce" ROB normally does when he D-airs.
PIVOTING/REVERSING THE ROBO-BURNER
Before I get into detail on these two facets of the Robo-Burner, let me differentiate between Wavebouncing and Pivoting/Reversing the Robo-Burner. While these may not be the "official" terms for said actions, I am clarifying now to avoid confusion.
Pivoting: Changing the way ROB *faces*, while keeping the same momentum.
Ex: ROB is floating to the right, facing right. Pivoting/Reversing the ROBO-Burner results in him now facing the left, while still floating right.
Wavebouncing: Changing the way ROB faces, and changing the momentum.
Ex: ROB is floating to the right, facing right. Wavebouncing the Robo-Burner results in him facing left, and now floating left.
Pivoting/Reversing the Robo-Burner (Airborne)
DuLL RaZer said:Before I get into detail on these two facets of the Robo-Burner, let me differentiate between Wavebouncing and Pivoting/Reversing the Robo-Burner. While these may not be the "official" terms for said actions, I am clarifying now to avoid confusion.
Pivoting: Changing the way ROB *faces*, while keeping the same momentum.
Ex: ROB is floating to the right, facing right. Pivoting/Reversing the ROBO-Burner results in him now facing the left, while still floating right.
Wavebouncing: Changing the way ROB faces, and changing the momentum.
Ex: ROB is floating to the right, facing right. Wavebouncing the Robo-Burner results in him facing left, and now floating left.
Pivoting/Reversing the Robo-Burner (Airborne)
This is pretty darn easy. Once you are airborne, simply hit up+B and rotate the control stick the opposite way you are facing. It doesn't take much, just a light flick of the thumb.
This can be done from a normal jump/double jump, or after an aerial that you used to cancel his up+B
A Few Applications:
->During a F-air WoP, you can finish the "combo" off with a reversed B-air
->If you are chasing an airborne opponent, and they pull off something to reverse their momentum/direction, you can match it and hit with an appropriate aerial.
->While being edgeguarded, you can drop down and pivot the up+B (holding down afterward so as not to re-grab the ledge) and B-air them, or use the B-air to put some distance between the two of you, and use a laser/gyro.
Pivoting The Robo-Burner (Grounded)
This is slightly more difficult, especially if you have tap-jump off.
With Tap Jump On; Start running in one direction and execute the same button input as performing it in the air. Simply up+B and rotate the control stick a bit in the opposite direction.
With Tap Jump Off v1.0: In order to do this without tap jump on, and without remapping your buttons (more on that in a sec), you are going to have to use the "claw" method- that is to say, middle/ring finger on either Y/X respectively, index finger on B.
Start running in one direction and input jump and then almost immediately input up+B.
With Tap Jump Off v2.0: If using the claw method isn't your thing, you can map an additional "jump" to a button you rarely use. So, I mapped Z to jump. With that in mind, begin running in whatever direction, press Z(or whatever button you mapped an additional jump to) and almost immediately up+B.
A Few Applications:
-> You can run away from an opponent, and use it to turn around in the air and use an F-air to cover your retreat.
-> Instead of waiting until you run off the stage to do a pivoted up+B into a B-air edgeguard (in the event an opponent is recovering and over the stage already, and is looking for a place to land), you can execute it from the ground.
-> Use it as a cross-up
-> If you mess up reading your opponent, and overshoot your pursuit of them, you can go ahead and go past them into an aerial without having to RAR one..
Wave Bouncing
In essence, to Wavebounce, you need horizontal momentum. While in the air (it works grounded, but for obvious reasons you don't get the "bounce effect") use a B move and IMMEDIATELY press the opposite direction on the analog stick.To perform you need forward momentum (running and jumping works) , you need to be in the air, and perform a B move in the direction you are facing and INSTANTLY slamming the (left) stick in the position directly opposite the direction you are currently moving. You will reverse all momentum and perform the B move while 'Bouncing' in the opposite direction.
The easiest B move to do this with is Side B, perform it like normal and then slam the stick in the opposite direction.
You can B reverse moves on the ground, but you will simply turn and do the attack ASAP (iasa), it is the fastest way to do a grounded reverse B move.
*You can not Wavebounce attacks with preset momentum (this does not include ROBs side B)
IV. Stages
Starter
Starter/CounterDuLL RaZer said:Battlefield:
A lot of ROBs just... *hate* this stage. I am not one of these ROBs. I actually find myself doing well here against most of the cast. But, I will try to keep it as "by the book" as possible.
+ Platforms can act as a natural "shield" which enables center stage camping/zoning while being in reach of the platforms with SH aerials.
+ Platforms can boost ROB's "underneath game" allowing him to land U-(move).
+ Can be flown under to help recovery options against vicious edgeguarders.
+ Can be flown over with ease to help recovery options.
+ The odd slant can be used to help land stage spikes
+ Smaller blast zones can help kill heavier characters earlier
- Platforms expose ROB's blindspots- both below and above.
- Smaller blast zones mean ROB can die earlier
- Characters with a strong "underneath" game will do exceptionally well here
- While you *can* camp the center/edges of the stage, things are a bit more cramped
- Larger characters or those with disjointed aerials (Bowser or Marth respectively, among others) occupy a TON of space and can control large portions of the stage (Snake!)
I'll forgo what characters to take/avoid here for now, as aside from the obvious ones, a lot of the cast is "This is a good stage for them, but against ROB... eh, I dun know..."
Final Destination:
A lot of ROBs LOVE LOVE LOVE this stage, generally. To me, its very "eh". Sometimes I feel incredibly comfy on it, and sometimes I don't.
+ Long and flat with no obstructions to camping.
+ Large blastzones to keep ROB alive longer
+ Lip can help get stage-spikes or silly SD's
+ Can be flown under for recovery purposes
+ Can be flown over with relative ease/lack of danger for recovery purposes
+ Lack of platforms minimizes ROB's blindspots
- CG's & Locks last longer
------------->DDD's
------------->IC's Ice block Lock
------------->Banana Locks, Laser Locks, Jab Locks, etc.
- ROB can be outcamped by some characters such as Falco
- Harder to KO opponents because of the larger blastzones
- Stage lip can catch you and set you up for stage spikes if you aren't careful.
Smashville:
A good, solid stage. Probably my neutral of choice (generally speaking, though I prefer BF over any stage for SOME odd reason)
+ Long enough and unobstructed enough to camp a bit
+ Moving platform can help set-up ROB's underneath game
+ Platform is large enough to move around on to avoid getting totally handled from below
+ Moving platform can regenerate your Robo-Burner fuel
+ Smaller edges leads to Fresh B-throw KOs, and B-throw to full laser KOs.
+ Can be flown under for recovery
+ Can be flown over for recovery, just pay attention to the platform
+ Under the edge can snag stage spikes/SD's from opponent
+ Balloons
+/- CG's & Locks last longer than on BF, but shorter on FD. So, its a decent trade-off between "room to camp" and "room to get CG'd/locked" for most.
- Moving platform can save opponents/stop gimps
- Psuedo DDD infinite CG by DDD on moving platform
- Moving platform is large enough for OTHER chars to move around on safely
- Moving platform CAN become a hazard (c4, grenade, bananas, etc)
Yoshi's Island:
Personally, my least favorite of the neutrals...
+ Angled floor can create some cool laser angles
+ Central platform is good for camping under
+ Central platform can help ROB's underneath game
+ Tilting central platform can interrupt opponent's approaches
+Angled edge allows for protected camping, as it creates a favorable angle for anti-approaches
+ Gyro is harder to pick up, which can net you some free damage% on your opponent
+ Cghost thingy allows you a safer camping position, replenishes fuel
+ Sloped floor allows for a grab released U-smash on Wario
+/- Shy Guys
- Gyro is harder to pick up for YOU to use.
- Opponent can get recovery back thanks to the ghost
- Tilting platform can throw a wrench in your approaches
- Tilting platform can enhance other char's underneath games
- Laser/gyro can take unintended angles
CounterDuLL RaZer said:Castle Siege:
A tricky stage due to the transformations. Not too bad, but not the best, generally.
(1st Trans)
+ Platforms enable ROB's underneath game.
+ Can get some early gimps thanks to the silly edges
+ Walled edge enables some stage spikes and such
+ During transition TO this stage, you can catch an opponent off-the stage and too far to recover back
- Platforms can be a detriment depending on the opponent
(2nd Trans)
+ Can camp behind statues, as a laser will go through them
+ Odd platforms, but platforms none-the-less enable you to move around to not get ***** from below
+ Can marginally increase the effectiveness of ROBs underneath game
- Walk-off edge!
- Walk-off edge!
- Platforms to enhance other chars underneath games
(3rd Trans)
+ Most of the same +'s of FD, but with a slight obstruction
+ Possible to get a grab release U-smash on Wario on the tilted portion (???Maybe???)
+ Hanging on edge during transformation gets Robo-Burner back
- Most of the negatives of FD
Halberd:
+ Fly through floor helps in a lot of matchups
+ Central platform can hekp the underneath game
+ Central platform is large enough to maneuver on
+ Small boundaries can "even up" the KO potential between characters
+ Ability to camp while stage is airborne and grounded
+ Stage can be flown under for recovery purposes
+/- Stage Hazards
- Fly through floor is detrimental in some matchups
- Platform issues
Pokemon Stadium 1:
Generally, this is a CP I like for the most part.
+ Campy stage, there are places where you can really melt the clock.
+ Platforms to help ROB's underneath game
+ Stage spike/opponent SD chances due to the edge & the central pillar
+ Places to D-tilt lock
+ Lots of open, off-stage space to set up gimps
- Stage transformations can be tricky
- Melting the clock can be bad (Wario & fart camping)
- Platform issues
- Places to GET locked/trapped in infinites
- Stage objects can be 'controlled' (c4 on windmill for example)
Lylat Cruise:
+ Tilting stage can give silly angles to gyros/lasers
+ Edges can mess with some char's recovery (Fox/Falco/Ness/Lucas)
+ Platforms...
- Platforms...
- Through the floor trixies (Diddy, ZSS)
- Can be just... nauseating to look at!
- Can be hard to pick up gyro
Counter/BannedBrinstar:
Another tricky stage that you might not see a TON of. It is somewhat gimmicky, and I'm personally not a huge fan of it *generally* though it does have some advantages in some matchups.
+ Tendon... things can provide a marginal shield for camping behind.
+ Energy cell... things can act as a shield and trap.
+ Platforms arranged in such a way that you probably won't get entirely HANDLED from below
+ Platforms can boost ROB's underneath game marginally
+ Platforms are arranged in such a way that you can hit almost anywhere with your laser/gyro
+ Smallish blastzones can even out the KO potential between characters
+ Floor hazards can help your recovery if you run out of fuel
+ Gimping is possible, though more horizontal than vertical.
+/- Acid
- A bit cramped, especially against larger chars
- Tendon... things and energy cells can slightly prolong hitboxes
- Characters who depent on stage control can monopolize a lot of the stage at any given time
- Smaller blastzones can negate any recovery differential
Delfino:
Pretty good all around stage. Some stuff to worry about, but adjusting your playstyle on diff transformations will help tremendously in dealing with them.
All the "flight stages" are good, solid stages.
-------(+)Platforms to help out ROB's underneath game
-------(+)Generally large enough to maneuver on to avoid complete ****
-------(+)Fly through floors are generally good.
-------(-) Most of the drawbacks associated with BF
Beach Transformation
-------(+)Solid camping area, as the incline makes them approach right in F-smash/F-tilt/laser angles
-------(+)Water makes D-air more viable than normal
-------(-)Hard for ROB to approach if they are staked out on the inclines as it exposes his blindspot
Canal Trans
-------(+)Can camp the outermost platforms (in magnifying glass)
-------(+)D-tilt lock opportunity Rooftop Trans
-------(+)Not too bad for camping since it is rather long
-------(-)Walk-Off Edge to the right
-------(-)Wall infinite
Courtyard Trans
-------(+)Not too bad for camping, as it is rather long and has favorable angles
-------(+)Water at the edge makes D-air more viable
Plaza Trans
--------(+)Can camp the edges, as long as you are on the raised stepped portion.
--------(-) Walk-Off Edges on both sides.
Pillar Trans
-------(+)Can camp the outer pillars
-------(+)Marginal gimp opportunities
-------(+)Can fuggz with ledge invincibility
-------(-)Water is more of a hassle here than a help
Rooftop Trans
-------(+)Good and long, which you can melt the clock/camp on
-------(+)Pseudo D-tilt lock opportunity
-------(+)Non-grabbable edge wrecks some recoveries
-------(-)Walk-Off Edges
Yellow Rooftop Trans
-------(+)Can melt the clock by camping the outer edges
-------(+)D-tilt lock opportunity
-------(-)Wall infinite
(I think that's all the transformations)
Frigate Orpheon:
Probably my (and a lot of ROBs) CP. It will most likely be banned by your opponent, but in case they don't... feel free to choose it!
First Trans
-------(+)Can camp under the left platform
-------(+)Ungrabbable edge can wreck a lot of recoveries & set up gimps
-------(+)Ungrabbable edge can wreck a lot of recoveries & set up gimps
-------(+)Ungrabbable edge can wreck a lot of recoveries & set up gimps
-------(+)Free D-tilt opportunities on the elevating/lowering platform when it lowers
-------(+)Can go under the stage for recovery purposes
-------(-)Lowish Ceiling
-------(-)Can get locked against the same wall for a short period of time
Second Trans
-------(+)Can camp a bit under the central platform
-------(+)Can melt the clock/camp off the edge, using the appearing plates to recharge fuel
-------(+)Can go under the stage for recovery purposes
-------(-)Appearing plates can save some chars
Jungle Japes:
Camp heaven, one of ROBs best stages generally
+ Impossibly high ceilings negate most chars U-(move) KO options.
+ Can camp side platforms against most chars
+ Short side blastzones means a fresh B-throw or a B-throw to Laser will kill much earlier
+ Water is slightly (only slightly) less of an issue for ROB due to his ability to 'hover' over it.
+ Ability to melt the clock against chars without projectiles
+/- KlapTraps... they come every 10 seconds when the ones digit in the timer reaches "7"
- High ceiling means any U-smashes you manage to land thanks to the platform aren't as fabulous as it normally would be
- ROB tends to KO at an upward diagonal... so some 'lighter' chars will be living a LOT longer than you'd expect (GaW, MK)
- Side platforms can be used against you by some chars, especially those with multiple jumps & large hitboxes on their attacks
Pictochat:
Another stage with a large-ish ceiling, hazards, and other oddities
+ High ceiling means you can live quite a long time from chars who have strong U-(move)
+ Main transformation is pretty similar to FD
+/- Hazards
+/- Hazards that are more awkward than hazardous
- Odd edge trixies (Kirby's infinite stone thingy)
- Harder to gimp here
- Hard to land a U-smash for most of the stage & its transformations
- Harder to KO most opponents, which evens up the "length of time they normally live compared to ROB" differential
Pirate Ship:
Ugh... just... try to stay away from it
+ Can marginally take advantage of the central platforms
+ Water makes a D-air spike a bit more manageable
+ Can camp the Red Lion tug-boat deal to melt the clock
+/- Hazards
+/- More dumb hazards
- Hard to utilize projectiles here because of the shape of the ship
- Ship's "falling" transformation keeps ROB and other chars in the air... meaning if they are under hm, they are staying under him
- Shape of the ship's deck is just... not good for ROB
Pokemon Stadium 2:
Similar to Pokemon Stadium 1, aside from totally different transformations and edges
+ Main stage is a pretty solid stage, with same +'s as PKMST1
+ Can melt the clock on the "rock" transformation
+ D-tilt lock against the large stone
+ Ice stage can be camped by staying on the un-iced edge, if the opponent doesn't want to approach
+ Ice transformation can make GT'ing ridiculous
+ Wind transformation can create some nifty, low % aerial chains.
+ Conveyor belt trans can make GT'ing super effective
+ Camping the solid center is a great way to keep opponent on defensive
- Main stage has same drawbacks as PKMST1
- Can be wall infinited during "rock" transformation on the large stone
- Ice transformation can allow some slow chars to approach really quick, and DACUS' become ridiculous... so do GT's
- Wind transformation can pose huge problems if opponent is below ROB
- Conveyor transformation... see: DACUS, GT, and approaches becoming faster (if they are on the correct side to do so)
Rainbow Cruise:
What can I say, its Rainbow Cruise...
+ Boat is arranged where you can (wisely) camp the back end near the propellers for a bit.
+ Shorter blastzones means it takes "less" to gimp, but there isn't much room to maneuver
+ D-tilt lock chance against the wall
+ Platforms and associated benefits on boat
+ Ship's bow is good for getting extreme laser angles
+ Second 'phase' is (ascent and then alll the platform/rug parts) is great for gimping
+ Fly through floors are generally good
+ Second phase lets ROB's up+B shine
+ Third phase has a possible lock against the checkered wall
+ Camping the right side is a good thing during third phase
+ Stage is good versus characters who are immobile, lack projectiles, or have horrid recoveries (most of the cast)
+/- Dissapearing blocks; on third phase if the block drops, you can drift in to land on a platform
- Can be be wall-locked on boat
- Platforms and associated drawbacks on boat
- Fly-through floors is a bad thing against some characters
V. TipsDuLL RaZer said:Norfair:
This is a tricky, silly, stage. It takes some practice to get used to, and it is a very MU dependent stage. Generally, you want to stay away from this stage...
+ Platforms to camp on (against slow chars with no projectiles)
+ Platforms to abuse ledge invincibility
+ Platforms can net you some free U-smashes
+ Lowish ceiling nets early KOs from U-smashes
+ ROB has an extra method to deal with the "over the stage" lava flows (Up+B over it)
+ Large stage where you can literally run the clock against some chars
+/- Lava
- Platforms are arranged in such a way that camping is hindered, depending on character positions
- Other chars can abuse ledge-invincibility
- Usually good for helping out tether char recoveries & preventing gimps
- Gyro can get caught and bounce around for an inordinate time due to the lava flows
- Platform issues
- Other, more mobile chars can melt the clock against ROB
Yoshi's Island (Melee/Pipes):
Another sort of wacky, gimmicky stage. Definitely not one of my favs (no cp from me), but it is such a rare occurrence to be CP'd here that I wouldn't worry TOO much about it. I rarely play on it, so my +/- is based solely on theorycraft
+ Ridiculously short sides means you need to only snag one or two f-airs offstage to get a gimp
+ Blocks can net a U-smash kill at lowish percents.
+ Can net a grab released U-smash on Wario (possibly?)
+/- Blocks in general...
- Silly boundaries neutralize ROB's survivability
- Walk Off Edge
- Walk Off Edge
Port Town Aero Drive:
Think Delfino meets Big Blue...
+ Grabless edges wreck tether recoveries during flight stage, and recoveries in general as it robs (no pun intended) of ledge safety.
+ Hard to gimp unless it horizontally for the most part of the flight stage due to floor hazards
+ Fly-through floors during flight stage are generally good.
+ D-tilt shenanigans against the track's retaining wall on "grounded" stages
+ Various places for silly gimps and damage racking opportunities
+ Track harzard doesn't bother ROB as much as many other chars due to his ability to stay above it
+ Transformations with platforms are generally spread out far enough so that ROB won't get platform *****
+ Room during transformation to stall a bit offstage without worrying about running out of fuel, as you can use floor hazards to get back onto the stage if absolutely necc.
+/- Hazards
- Walk off edges at one transformation
- Gimps aren't necc. harder... just more involved
- Stage portion that can get some d-tilt shenanigans also pose a wall-infinite threat
Luigi's Mansion
Banned at a lot of places, its really MU dependent. Its a tricky stage and takes some getting used to.
+ Pillars stop practically all projectiles except ROB's laser
+ ^ Leads to camping
+ U-tilt shenanigans because of the ceiling
+ Silly edge can net some free kills against some chars
+ (After Mansion Destroyed) You get a nice long central platform to camp on... like FD.
+ Ridiculously high ceiling keeps you alive longer against chars with strong U-(kill) games
+ Chest high platforms can get you some easy percent
+ Silly ceiling inside the mansion on the lower level
+ If your opponent can't tech... YAY!
+ U-smash easier to land... somewhat
+ Can melt the clock
- Silly ceiling inside mansion can lead to ROB getting handled by some moves
- Central platform (after mansion is destroyed) has similar drawbacks to FD
- High ceiling means landing a U-smash isn't as fabulous as it normally would be
- If you can't tech... BOO!
- Chest high platforms can get you WRECKED
- ROB can get platform ***** kind of hard, as there is only one small section on the 2nd story that is fall-through.
- Clock can be melted against ROB
Green Greens
Why couldn't they have used one of the GOOD Kirby stages?!
+ Can easily melt the clock against chars who have no projectiles to explode bombs
+ Pretty decent at presenting gimping opprotunities
+/- Bombs
+/- Blocks
+/- Peaches
+/- Whispy Woods
- Wall infinites against blocks
- Very... cramped.
(admittedly, I don't play too often on this stage as its just... too gimmicky for my tastes... so, anything that would flesh this out would be great)
Distant Planet
+ Large, open area underneath (and to the side when the... worm thing isn't there) to set up gimps
+ Can camp the hill marginally well
+ Fly through floor
+/- Waterflow on the platform
+/- Flower... seed things
+/i Worm... thing
- Walk off edge
- Funky platforms
(another stage I don't play on... like, at all)
Miscellaneous
Varying your Projectiles
DuLL RaZer said:We all know that one of ROB's strong points is his ability to camp a lot of people out. However, in a lot of the MU's, camping is neutralized by powershielding, which can make the MU much harder. Therefore, it is imperative to keep your projectile use fresh! Here are some ways.
Run toward opponent->SH->Reverse Gyro Cancel->Reverse Laser
Run away from opponent->SH->Reverse Gyro Cancel->Laser
Run away from opponent->SH->Reverse Gyro
Run away from opponent->Reverse Gyro on ground->cancel into a grab if they get close
Run toward opponent->gyro cancel->laser
Once the opponent becomes 'conditioned' to expect some sort of laser follow-up out of an approach that was RGC (reverse gyro cancell'd), that opens up some NEW stuff which *isn't* a projectile, like:
Run toward opponent->SH->Reverse Gyro Cancel->B-air
Run toward opponent->SH->Reverse Gyro Cancel->Reversed Up+B->F-air on descent.
DuLL RaZer said:Second Jump Renewal & Infinite Second Jump Renewal (SJR & ISJR)
The second jump renewal is a way to... well, renew your double jump. To perform this follow these steps:
1) Jump (full or short)
2) Second jump (at any time)
3) Perform an aerial
4) Time the aerial so that you land on the ground as the move finishes**
5) Buffer a jump just before you land on the ground.
6) You should second-jump into the air with zero landing lag or jump time, as you are actually recovering your second-jump without touching the ground..
** = The exact frame window is unknown at this point. It is believed to either be as the entire move animation ends or as the ending autocancel frames begin. It could possibly differ between moves. Clarification on this would be appreciated.
All aerials, evidently, can be SJR'd. However, only some aerials can be used to renew the jump infinitely over solid ground. ROB's aerials which can be used to renew the second jump infinitely are as follows:
Nair - Most likely
Fair - Yes - Fast fall-able!
Dair - Yes
Bair - Yes
Uair - Yes
Fast-fallable means that these aerials may greatly increase the frame window for inputting the jump command, thus making the timing easier.
Now, what does this mean for ROB?
Essentially, he can continually move through the air executing aerials, without the use of his up+B. This can translate (theoretically) to setting up a huge wall of disjointed aerials with lingering hitboxes. Mix that in with his camping game, and characters who are forced to approach will have very, very few safe options. Additionally, if applied correctly you won't have to worry about footstool infinites (as you create a continues wall of hitboxes to protect you), and to some degree CG's (as you won't be touching the ground, and you can continually space them).
However, the timing on this is *really* hard, and it would take a LOT of practice to be able to institute and apply at will. But, for those of you who <3 <3 <3 AT's, and are upset that ROB doesn't have many... then feel free to learn this to your hearts content.
*all credit goes to Ekaru, 3xSwords, and Makkun for this discovery and its extensive testing, and even the majority of this post (as I more or less jacked it because the explanation was much better than what I could come up with). I am attempting to get in touch with them to get one of them to do a vid showing this in action for ROB.
