
Koskinator
Smash Lord
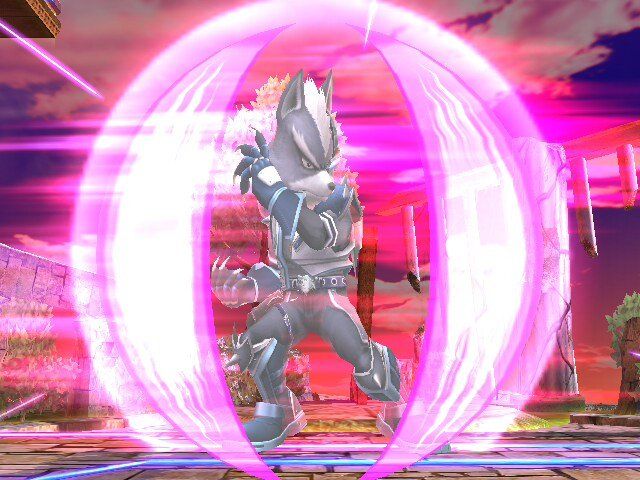
The Essence of Wolf
Table of Contents
1. Overview/Terminology
2. Moveset
3. Advanced Techniques (AT's)
4. Approaches and Offensive Gameplay
5. Defense and Turtle Gameplay
6. Death Chart
7. Matchups
3. Advanced Techniques (AT's)
Scarring
Description- Scarring is DI'ing away from a ledge, then illusioning through the stage right away. You can scar on Battlefield, Smashville, Yoshis Island, Norfair, Halberd Ship, Pictochat, and a few others. It gives you another option on how to get back onto the stage, and can also be a surprise attack. Don't use it too often though, it can get predictable and you will get punished.
Semi-Scarring
Description- Semi Scarring is essentially the same thing as scarring, except you dont have to be near the ledge. All you do is start your illusion at the stage, but hold DOWN after you input the illusion. It will cause you to ignore the edge sweetspot and fly right through. Semi Scarring is possible on Final Destination, though it is risky.
Telestepping
Description- This allows you to instantly appear on the edge of the stage. What you do, is drop off a ledge, the jump right up to it, but so you dont sweetspot it. Then, right next to the ledge, do an illusion, it will cause you to pop right onto the stage. Personally, I find this pretty useless.
Boost Smashing
Description- Boost smashing is when you slide way forward while doing your up smash. The input to make it work is (Dash > C stick down > Up + Z). Many other characters can do this, its a great technique for Wolf too.
4. Approaching and Offensive Gameplay
Wolfs strong point is definetly his approaching and offensive style. Your best approach is a Reverse Aerial Rush (RAR) Short hop Fast Fall Bair. You need to jump with X or Y for this to work consistently and effectively. Once you learn how to do it, you will be able to DI forward and back while doing it, so you can space it so just the tip of the bair hits your opponent or your opponents shield. Because of bairs massive range, if you space it properly, the only character in the game who should be able to shield grab you is Olimar. That means you can pressure DDD up close with many bairs on his shield and he wont be able to shield grab you. Thats not to say only attack with bair, Wolf has many other approach options. A properly spaced and DI'd fair cant be shield grabbed either. Because of Wolfs auto cancel aerials on both sides of him, it gives him the ability to actively pressure shields. Mindgaming with boost smash is another good thing about Wolf. Just throw out random auto canceled aerials to psyche your opponent out, then as soon as you land on your auto cancel, quickly boost smash forward. You can also do the same sort of thing with Ftilt, but you need to make sure your opponent is trying to approach after your aerials. However, I do see too many Wolfs approaching with Fire Wolf. Dont. It does 11% and is punishable, bair does 13% and isn't punishable. Also, try not to approach with Nair at all. It's ok for relieving pressure, but dont use it as a main approach. You can also do full jump bairs into double jump bairs, also known as the Wall of Wolf. All it is is creating a "wall" of damage and priority over your opponent so they have a tough time approaching. You can also trying approaching with jab and jab mixups into grabs. At around 50%, you can start tech chasing with down throw, its a great tech chase if they dont tech the first throw. Basically you wanna get strings of bairs going off stage and then juggle them when they try to recover from above. Of course, this wont work on certain characters, like Lucario, but overall it is a good strategy.
5. Defense and Turtle Gameplay.
Because of Wolfs weight, reflector, and blaster, he can survive and still fight back at high percentages. Because of the reflector sending things back twice as fast, a lot of people will not camp against Wolf because of fear of getting all their projectiles back in their face. The only character who can outcamp Wolf is DDD because you cant reflect waddle dees and the waddle dees that are already on the field absorb lasers. Retreating bairs are a must when your playing defensively. It makes it very difficult for the opponent to get in your hit zone to land a kill when your retreating with a lagless, high range attack. Shine is also your best friend when it comes to survival. When your feeling pressured, keep your shine going, shine to jab or shine to dtilt is guarenteed, so keep that in mind in order to get some breathing room in tough situations. You basically want to avoid any laggy attacks when your trying to survive at really high percentages. Basically this part of the guide is just for when you at like, 150% trying to get as much damage as you can on you opponent before they kill you. By no means necassary should you be playing like this at 0%. Attacks you want to avoid when playing like this are Ftilt, Utilt, Fsmash, Usmash, Dair, lagged Fair, Fire Wolf, any laggy attack basically. Stick to laser, shine and bair and dsmash if you are able to get a kill.
Death Chart
The following moves were tested on a level 9 Mario from the center of Final Destination.
AAA- First hit will never kill, second hit will never kill, third hit will kill at 245%
Ftilt- Will kill at 199%
Utilt- Will kill at 130%
Dtilt- Will kill at 259%
Nair- Will kill at 183%
Fair- Will kill at 139%
Dair (Assuming their in a standing position)- Will kill at 181%
Bair- Will kill at 140%
Uair- Will kill at 184%
Full Front Smash- Will kill at 149%
Tipper Front Smash- Will kill at 150%
Upsmash- Will kill at 128%
Down Smash in front- Assuming it's a good hit, 118% (A good hit being, it wasn't too close)
Down Smash Behind- Assuming it's a good hit, 128%
Uthrow- Will kill at 292%
Dthrow- Assuming it kills from the side, not because of lack of recovery, it will kill at 282%
Fthrow - Assuming the trajectory is rainbow, 275%
Fthrow V2- Assuming the trajectory is more horizontal, 229%
Bthrow - Assuming the trajectory is more diagonal, 254%
Bthrow V2- Assuming the trajectory is more vertical, 232%
Dash Attack - Assuming the trajectory is more horizontal, 198%
Dash Attack V2- Assuming the trajectory is more vertical, 191%
Matchups
This part of the guide will go onto explain if Wolf is in an advantageous position or a disadvantageous position against certain characters.
Mario- 50/50 Neutral
Donkey Kong- 55/45 Neutral
Link- 60/40 Advantage
Samus- 60/40 Advantage
Kirby- 45/55 Neutral
Fox- 55/45 Neutral
Pikachu- 45/55 Neutral
Marth- 45/55 Neutral
Mr. Game and Watch- 40/60 Disadvantage
Luigi- 55/45 Neutral
Diddy Kong- 45/55 Neutral
Zelda- 60/40 Disadvantage
Sheik-45/55 Neutral
Pit- 50/50 Neutral
Metaknight- 70/30 Disadvantage
Falco- 45/55 Neutral
Squirtle- 50/50 Neutral
Ivysaur- 60/40 Advantage
Charizard- 60/40 Advantage
Ike- 60/40 Advantage
Snake- 50/50 Neutral
Peach- 40/60 Disadvantage
Yoshi- 60/40 Advantage
Ganondorf- 70/30 Advantage
Ice Climbers- 45/55 Neutral
King DeDeDe- 25/75 Disadvantage
Wolf- 50/50 Neutral
Lucario- 45/55 Neutral
Ness- 55/55 Neutral
Sonic- 60/40 Advantage
Bowser- 55/45 Neutral
Wario- 45/55 Neutral
Toon Link- 55/45 Neutral
R.O.B.- 35/65 Disadvantage
Olimar- 60/40 Advantage
Captain Falcon- 65/35 Advantage
Jigglypuff- 65/35 Advantage
Lucas- 60/40 Advantage
Zero Suit Samus- 55/45 Neutral
Mario- Mario vs Wolf is a very even match. Both are very capable in the air, but Wolf has a slight advantage on the ground. To offset this, Mario can Utilt juggle us at 0 to around 40%. Overall, you never want to be above or behind Mario unless if its over short hop height, you will get combo'd by Uairs and Bairs to hell. Overall, keep him poked with bairs and fairs, try your best to avoid fire balls, and try to keep the fight close and grounded. Jabs, Ftilts and Bairs will wreck Mario, but he can do the same to you with Grabs, Uairs and Bairs. It all comes down to whos better.
DK- Wolf has a slight advantage over DK in the form of laser. He can Utilt us for about 30-40% from 0, his bair makes ours look like ****. His tilts are very anti-approach. So, to offset this, we laser to make him approach. An approaching DK will likely go for SH RAR bairs, so you need to be ready to dodge and punish with our bair, or shield grab it. Alot of DK's will Dtilt twice and then Down B, so thats something to watch out for aswell. Cargo spiking is a pain, so at higher percents, try your best not to get grabbed.
Link- Wolf has a nice advantage on Link. We wreck him in the air and on ground, but he does have annoyances like boomerang and arrows. Basically, once you get in his projectile range, you can destroy him with Fairs and Bairs. Because of Links horrible recovery, often times all it takes is a high percent Dthrow into edge hog for a kill. Also, Dsmash kills much earlier because of his bad recovery. As long as you keep on him and dont give him and chance to break away and spam you, it wont be a hard match.
Samus- Wolf has a really easy time with Samus. She cant camp on account of reflector, but we can. Once you get into her missle and charge shot range, she cant do anything. Zair is basically an annoyance, but once you get too close for her to use it, she cant do anything. Wolf destroys Samus in the air and on the ground, I prefer going in the air with AC Fairs and Bairs myself. A good Samus player will most likely Up-B out of shield when you attack, so just predict and punish.
Kirby- A somewhat difficult match-up for Wolf, mainly because of the Gonzo combo. If you can avoid grabs early on, we can get in Kirbys face with Bairs and Ftilts, I find grabs work well on Kirby too. Your going to have to try harder to hit him with Bairs though, if he crouches, he is extremely low to the ground, making bairs harder to connect with. Kirbys most reliable KO move is Fsmash, so make sure you avoid it, a lot of Kirby players will Dair into Fsmash, but the Fsmash is avoidable, so get your shield up. He'll also go for retreating fairs, so predict and punish with your own fair or bair.
Fox- inb4cantletyoudothatstarfox. Anyway, Wolf can have a hard time with Fox if you dont know what your doing. His dair into utilt combos us to around 45% right away, so avoid dairs. But, Fox has virtually no good answer to our Bair, so, spammmmmm that bair. Also, go for dsmash earlier in this match. Dsmash around 60%, laser him when he's illusioning back to the stage, this forces him to have to Up-B, you jump down, shine his Up B, recover and edgehog for a stock. Its a really hot gimp, it works even better on Falco because you dont need to edgehog in order to kill him. Foxes jab is really good if you dont DI out of it, his main killing move is Upsmash. Just spam bair and get the shinespike gimp as often as possible, it shouldn't be too difficult.
Falco- Falco used to be considered Wolfs hardest matchup. The basic strategy of this match is as follows. Spam laser at start nonstop. Roll away, spam more. Eventually, he'll start reflecting the lasers back at you. Eat those lasers up until you around 35-40%. Now he cant chain spike. Proceed to space **** him with bairs. Once hes around 50-70%, dsmash near the edge. Falco will then illusion to recover, we laser him so he falls and is forced to use Up B. You jump down, shine spike. GG Falco.
And for now, that concludes my guide. Appologies for how long it took me to finally rewrite it, but I will try my very best to keep it updated. On that note, everyday I will write 3 more matchups, giving advice as I see how the match should be played.
Koskinator
GANON 4 LIFE
Table of Contents
1. Overview/Terminology
2. Moveset
3. Advanced Techniques (AT's)
4. Approaches and Offensive Gameplay
5. Defense and Turtle Gameplay
6. Death Chart
7. Matchups
1. Overview and Terminology
Wolfs first official appearance was in Star Fox 64 for the Nintendo 64. He is the leader of the renegade space squadron Star Wolf. He has been Fox McClouds rival in all the games hes been in, though he has a respect for Fox. In Super Smash Bros. Brawl, Wolf has many great aspects. He is the fastest faller without fast falling, he has really fast and strong aerials, he has great range all around, multiple effective killing moves and some combos. (Combos in brawl?). However, Wolf does have some trouble recovering and can be gimped by certain characters. We'll get into the terminology that you'll likely see alot of throughout this guide.
Jab - AAA Combo
Ftilt- Front Tilt Attack
Dtilt- Down Tilt Attack
Utilt- Up Tilt Attack
Fsmash- Forward Smash
Dsmash- Down Smash
Usmash- Up Smash
Shine- Reflector
Illusion- Wolf Illusion
Uair- Up Aerial Attack
Nair- Neutral Aerial Attack
Bair- Back Aerial Attack
Fair- Forward Aerial Attack
Dair- Down Aerial Attack
SH- Short hop
FF- Fast Fall
2. Moveset
Jab
Uses- Combo, Damage Builder
Damage- First Hit 3%, Second Hit 2%, Final Hit 4%
KO Potential- None
Description- Wolfs Jab is great. It comes out fast, cant be shielded once the first hit connects, does 9% if all hits connect, which seems low compared to Ike or Snake, but it's not too bad. It has enough knockback that you can't get hit in your lag frames from the final hit.
Dash Attack
Uses- Punishing a missed tech, gtfo my face move
Damage- 9%
KO Potential- Very very limited
Description- Wolf runs forward and does a backflip kick. Depending on where you hit your opponent, the trajectory they travel changes. If you hit them right up close, the go up, if you hit them from further away, they go more sideways. Overall, I try not to use this attack at all.
Forward Tilt
Uses- Countering, Damage Builder, Shield Eater
Damage- 11% for both hits, 6% for just the tip
KO Potential- Decent right at an edge, otherwise very low
Description- Wolf slashes his opponent with both claws. The first hit does a stun like thing, similar to ZSS stun gun without the electricity. The good thing about it, it comes out not too slow, but it eats shields for breakfast. Try doing retreating RAR SH FF bairs and throwing out Ftilt once in awhile when someone tries to approach when you hit the ground.
Down Tilt
Uses- Anti Approach, Low % Grab Follow-up
Damage- 6%
KO Potential- None
Description- Wolf quickly kicks one foot forward. It comes out very fast, and it can trip at lower percents. So every so often, go for a dtilt into dash grab. Its good at low % for a grab follow-up, such as down throw. As you get better with it, you'll notice more places for it to be utilized.
Up Tilt
Uses- Juggler, Punisher from close, High % KO move
Damage- 10%
KO Potential- Low-Mid
Description- Wolf quickly does a high rise kick. I like to treat it as a less beefy version of Snakes Up Tilt. Its also good at punishing a spot dodge if your right next to your opponent. It can also juggle heavy characters quite well into the 40's.
Forward Smash
Uses- KO move, Punisher, Spacer
Damage- 5% on first hit, 10% on second, 15% total. 21% Fully Charged
KO Potential- Mid-High
Description- Wolf lunges forward with one claw bent forward. It is quite fast, has killer range, and can combo out of a Bair at Low-Mid percentages. It's definetly one of Wolfs best moves. That doesnt mean spam it, use it when the opportunity presents itself, spamming Fsmash will make you eat shield grabs over and over againest good players.
Up Smash
Uses- KO Move, Damage Dealer, Approach, Stage Spikes
Damage- 6% on first hit, 12% on second, 18% total. 25% Fully Charged.
KO Potential- High
Description- Wolfs pops into the air and makes a scissor swipe with his legs in the air. This move is great. It comes out at a decent rate and is great for damage dealing. If you can boost smash consistently, it makes for a great mindgame approach. Throw out retreating bairs, then come at them fast with a boost smash as soon as you hit the ground, it will throw them off guard. Also, some characters will get stage spiked by this move. If you have, for instance, Rob hanging on the ledge with no invincibility frames, boost smash towards the very edge. Occasionally, you will hit him with the initial hit, which will smash him into the stage, spiking him. To my knowledge, this works on Mid to Large size characters.

Down Smash
Uses- KO Move
Damage- 14% on front hit, 13% on back. When fully charged, 19% on front hit, 18% on back hit.
KO Potential- Very High
Description- Wolf quickly slashes infront of him, then quickly behind him. This is easily Wolfs best kill move. It comes out very very fast, has huge power, and a very horizontal trajectory. But I must say, do not spam this move. I see too many Wolfs using it just to get their opponent away, use something else. You wanna keep this move fresh for killing.
Up Aerial
Uses- Juggling, Damage Dealer
Damage- 12%
KO Potential- Mid KO potential on a low ceiling or high up
Description- Wolf does a quick claw swipe above his head. It comes out relatively fast with very little lag. Its an ok attack at best, thats not to say dont use it though.
Forward Aerial
Uses- KO Move, Juggling, Random Spike, Approach
Damage- 11%
KO Potential- High Mid - High
Description- Wolfs slashes his claw out infront of him in midair. If you short hop into fair really fast, it autocancels when you land, meaning you have no lag. This attack comes out very fast and can KO at around 130ish. Its a good move, use it liberally.
Neutral Aerial
Uses- Anti Pressure, Gimping
Damage- 8% on first hit, other hits do 1% each.
KO Potential- Minimal
Description- Wolfs tucks his legs and goes into a cannonball position, spinning around in circles. Its a really mediocre attack except for one good point. If Falco or Fox is charging their Up B's towards the stage, jump off and nair them. They will be forced to come down with you and thus wont be able to recover. Other than that, its pretty bare bones.
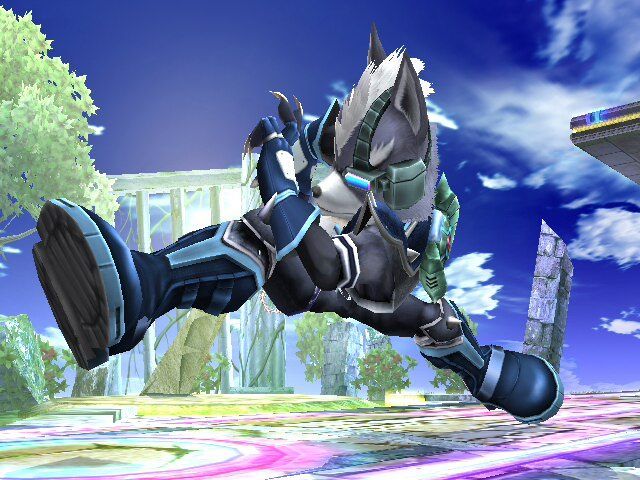
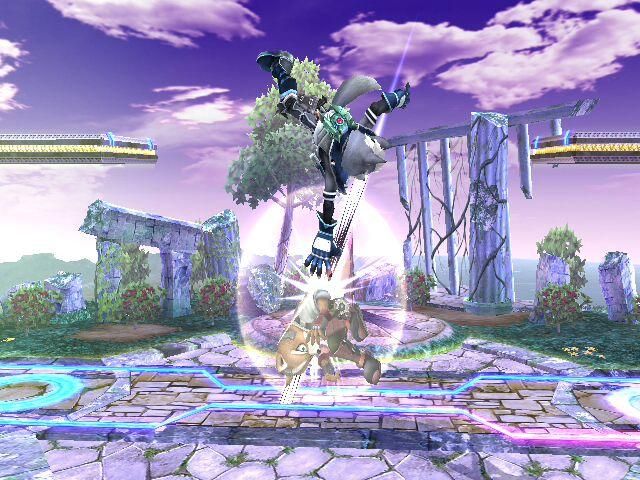
Down Aerial
Uses- Spiking
Damage- 15%
KO Potential- High as a spike, very low as a sky KO.
Description- Wolf takes a big swing down between his legs and plummets his opponents downwards. This is a great spike, but it takes some time getting used to, just make sure you dont try and double jump off the stage and hit, you wont be able to recover.
Back Aerial
Uses- KO Move, Damage builder, spacer, destroyer of worlds, cracker of planets
Damage- 13%
KO Potential- High
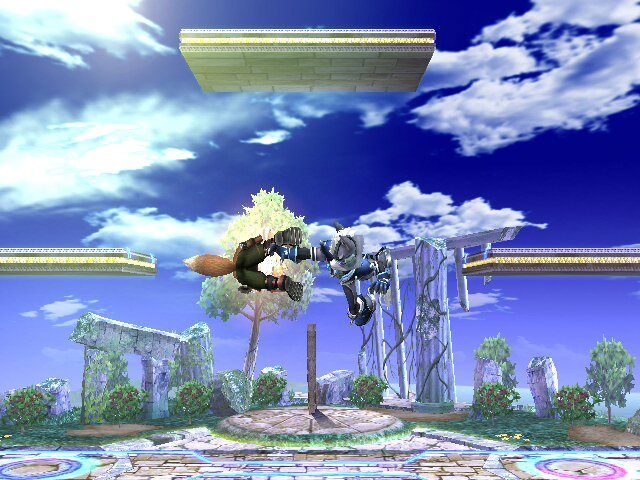
Description- Wolf kicks behind him very fast and hard. This is Wolfs BEST move. If your bair isn't doing 7% by 30 seconds into the match, your not using it enough. I'm telling you right now, wh*re the **** out of this move. It is absolute sex to the eyes and ears. It has no lag when it hits the ground, has massive range, and, when spaced properly, cant even be shield grabbed by DDD.
Grab Attack
Uses- Damage Dealing
Damage- 1% per hit
KO Potential- I lol'd
Description- Wolf holds his opponents and delivers blinding speed knees to the face. Each one does 1%, try and get in as many as you can before doing your throw, every % counts.

Down Throw
Uses- Damage Dealer, Tech Chasing
Damage- 12%
KO Potential- Low
Description- Wolf grabs the opponent and slashes them from above, sliding them across the stage. It's your best throw. The best thing about it is the fact that you can tech chase multiple down throws. However, the tech chase can end abruptly if they tech it at the start.
Forward Throw
Uses- Quick Release Throw, Damage Dealer, Spike Set-up
Damage- 7%
KO Potential- Very Low
Description- Wolf grabs the opponent and delivers a big elbow, sending the opponent sideways. Its good for a quick release grab to relieve pressure and also to set up for spikes. Otherwise, you should stick with down throw.
Back Throw
Uses- None
Damage- 7%
KO Potential- None
Description- Don't use this throw. It r bad.
Up Throw
Uses- None
Damage- 7%
KO Potential- None
Description- Dont use this throw. It r is being even worse than back throw.

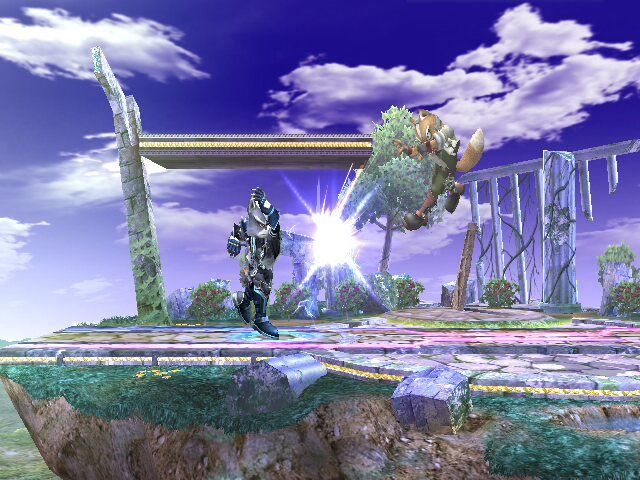
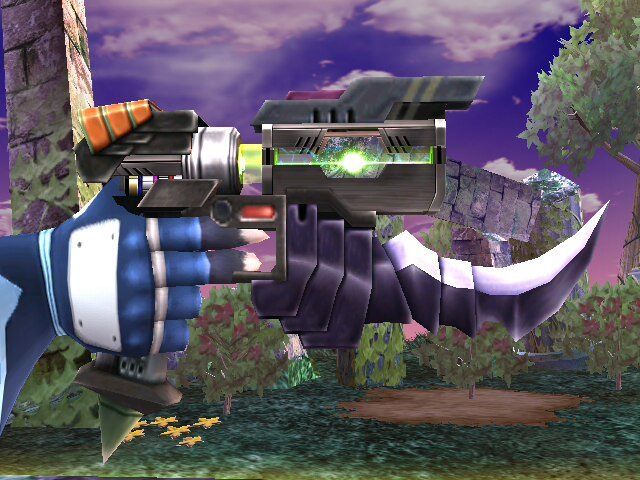
Lazor
Uses- Spacing, Camping, Damage Dealing, Gimping
Damage- Bayonet hit does 4%, laser does 6% up close, 5% far away
KO Potential- None
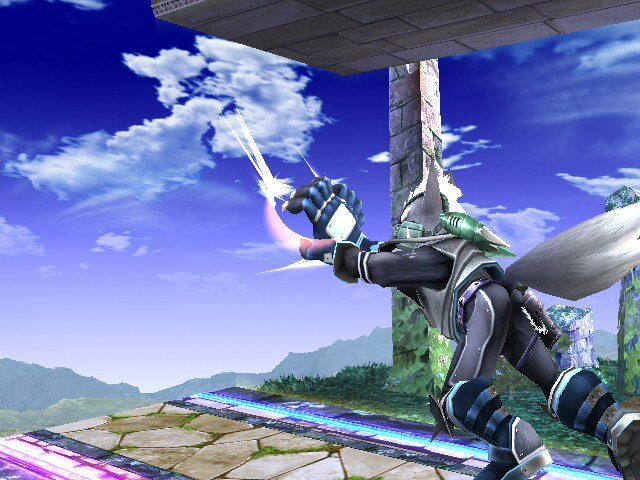
Description- Wolf takes out his blaster and fires a single shot at his enemy. It is a great projectile for spacing and camping. Its good for damage, you can shoot Fox and Falco out of their illusion when the recover and go for the Nair gimped mentioned earlier.
Fire Wolf
Uses- Recovery
Damage- 3% on final kick, 9-11% for entire move.
KO Potential- None
Description- Wolf shoots forward with one leg extended. Please, for the love of all that is holy, don't use this move.
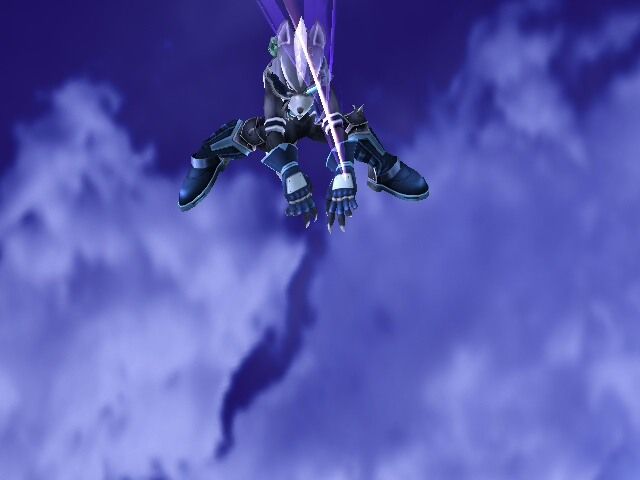
Wolf Illusion
Uses- Recovery, LolSpiking
Damage- The purple haze does 3%, a good sweetspot does 15%, bad sweetspot does 10%
KO Potential- Mid
Description- Wolf dashes forward at super speed, delivering a shocking blow at the end. If you sweetspot it well in midair, it spikes enemies straight down. But I really recommend not trying to attack with it, the risk outweighs the reward big time.
Reflector
Uses- Reflecting (lol), Countering, Gimping
Damage- 3%
KO Potential- ABSOLUTELY MIND BOGGLING
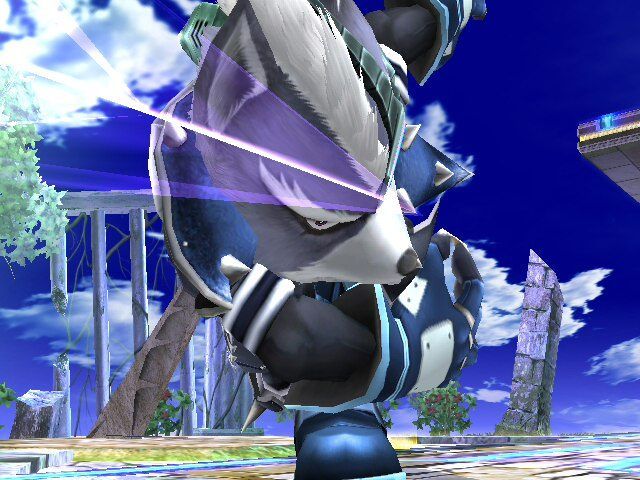
Description- Wolf activates his reflector, causing a big, red, cat eye like shine to come out. Sure, it sounds mediocre, but it has a special property to it. From the time you press Down + B to the time the move actually comes out on the screen, you are invincible. So its like a step dodge that does damage back. You can also shine spike Fox and Falco out of their Up B's.
Jab
Uses- Combo, Damage Builder
Damage- First Hit 3%, Second Hit 2%, Final Hit 4%
KO Potential- None
Description- Wolfs Jab is great. It comes out fast, cant be shielded once the first hit connects, does 9% if all hits connect, which seems low compared to Ike or Snake, but it's not too bad. It has enough knockback that you can't get hit in your lag frames from the final hit.
Dash Attack
Uses- Punishing a missed tech, gtfo my face move
Damage- 9%
KO Potential- Very very limited
Description- Wolf runs forward and does a backflip kick. Depending on where you hit your opponent, the trajectory they travel changes. If you hit them right up close, the go up, if you hit them from further away, they go more sideways. Overall, I try not to use this attack at all.
Forward Tilt
Uses- Countering, Damage Builder, Shield Eater
Damage- 11% for both hits, 6% for just the tip
KO Potential- Decent right at an edge, otherwise very low
Description- Wolf slashes his opponent with both claws. The first hit does a stun like thing, similar to ZSS stun gun without the electricity. The good thing about it, it comes out not too slow, but it eats shields for breakfast. Try doing retreating RAR SH FF bairs and throwing out Ftilt once in awhile when someone tries to approach when you hit the ground.
Down Tilt
Uses- Anti Approach, Low % Grab Follow-up
Damage- 6%
KO Potential- None
Description- Wolf quickly kicks one foot forward. It comes out very fast, and it can trip at lower percents. So every so often, go for a dtilt into dash grab. Its good at low % for a grab follow-up, such as down throw. As you get better with it, you'll notice more places for it to be utilized.
Up Tilt
Uses- Juggler, Punisher from close, High % KO move
Damage- 10%
KO Potential- Low-Mid
Description- Wolf quickly does a high rise kick. I like to treat it as a less beefy version of Snakes Up Tilt. Its also good at punishing a spot dodge if your right next to your opponent. It can also juggle heavy characters quite well into the 40's.
Forward Smash
Uses- KO move, Punisher, Spacer
Damage- 5% on first hit, 10% on second, 15% total. 21% Fully Charged
KO Potential- Mid-High
Description- Wolf lunges forward with one claw bent forward. It is quite fast, has killer range, and can combo out of a Bair at Low-Mid percentages. It's definetly one of Wolfs best moves. That doesnt mean spam it, use it when the opportunity presents itself, spamming Fsmash will make you eat shield grabs over and over againest good players.
Up Smash
Uses- KO Move, Damage Dealer, Approach, Stage Spikes
Damage- 6% on first hit, 12% on second, 18% total. 25% Fully Charged.
KO Potential- High
Description- Wolfs pops into the air and makes a scissor swipe with his legs in the air. This move is great. It comes out at a decent rate and is great for damage dealing. If you can boost smash consistently, it makes for a great mindgame approach. Throw out retreating bairs, then come at them fast with a boost smash as soon as you hit the ground, it will throw them off guard. Also, some characters will get stage spiked by this move. If you have, for instance, Rob hanging on the ledge with no invincibility frames, boost smash towards the very edge. Occasionally, you will hit him with the initial hit, which will smash him into the stage, spiking him. To my knowledge, this works on Mid to Large size characters.
Down Smash
Uses- KO Move
Damage- 14% on front hit, 13% on back. When fully charged, 19% on front hit, 18% on back hit.
KO Potential- Very High
Description- Wolf quickly slashes infront of him, then quickly behind him. This is easily Wolfs best kill move. It comes out very very fast, has huge power, and a very horizontal trajectory. But I must say, do not spam this move. I see too many Wolfs using it just to get their opponent away, use something else. You wanna keep this move fresh for killing.
Up Aerial
Uses- Juggling, Damage Dealer
Damage- 12%
KO Potential- Mid KO potential on a low ceiling or high up
Description- Wolf does a quick claw swipe above his head. It comes out relatively fast with very little lag. Its an ok attack at best, thats not to say dont use it though.
Forward Aerial
Uses- KO Move, Juggling, Random Spike, Approach
Damage- 11%
KO Potential- High Mid - High
Description- Wolfs slashes his claw out infront of him in midair. If you short hop into fair really fast, it autocancels when you land, meaning you have no lag. This attack comes out very fast and can KO at around 130ish. Its a good move, use it liberally.
Neutral Aerial
Uses- Anti Pressure, Gimping
Damage- 8% on first hit, other hits do 1% each.
KO Potential- Minimal
Description- Wolfs tucks his legs and goes into a cannonball position, spinning around in circles. Its a really mediocre attack except for one good point. If Falco or Fox is charging their Up B's towards the stage, jump off and nair them. They will be forced to come down with you and thus wont be able to recover. Other than that, its pretty bare bones.
Down Aerial
Uses- Spiking
Damage- 15%
KO Potential- High as a spike, very low as a sky KO.
Description- Wolf takes a big swing down between his legs and plummets his opponents downwards. This is a great spike, but it takes some time getting used to, just make sure you dont try and double jump off the stage and hit, you wont be able to recover.
Back Aerial
Uses- KO Move, Damage builder, spacer, destroyer of worlds, cracker of planets
Damage- 13%
KO Potential- High
Description- Wolf kicks behind him very fast and hard. This is Wolfs BEST move. If your bair isn't doing 7% by 30 seconds into the match, your not using it enough. I'm telling you right now, wh*re the **** out of this move. It is absolute sex to the eyes and ears. It has no lag when it hits the ground, has massive range, and, when spaced properly, cant even be shield grabbed by DDD.
Grab Attack
Uses- Damage Dealing
Damage- 1% per hit
KO Potential- I lol'd
Description- Wolf holds his opponents and delivers blinding speed knees to the face. Each one does 1%, try and get in as many as you can before doing your throw, every % counts.
Down Throw
Uses- Damage Dealer, Tech Chasing
Damage- 12%
KO Potential- Low
Description- Wolf grabs the opponent and slashes them from above, sliding them across the stage. It's your best throw. The best thing about it is the fact that you can tech chase multiple down throws. However, the tech chase can end abruptly if they tech it at the start.
Forward Throw
Uses- Quick Release Throw, Damage Dealer, Spike Set-up
Damage- 7%
KO Potential- Very Low
Description- Wolf grabs the opponent and delivers a big elbow, sending the opponent sideways. Its good for a quick release grab to relieve pressure and also to set up for spikes. Otherwise, you should stick with down throw.
Back Throw
Uses- None
Damage- 7%
KO Potential- None
Description- Don't use this throw. It r bad.
Up Throw
Uses- None
Damage- 7%
KO Potential- None
Description- Dont use this throw. It r is being even worse than back throw.
Lazor
Uses- Spacing, Camping, Damage Dealing, Gimping
Damage- Bayonet hit does 4%, laser does 6% up close, 5% far away
KO Potential- None
Description- Wolf takes out his blaster and fires a single shot at his enemy. It is a great projectile for spacing and camping. Its good for damage, you can shoot Fox and Falco out of their illusion when the recover and go for the Nair gimped mentioned earlier.
Fire Wolf
Uses- Recovery
Damage- 3% on final kick, 9-11% for entire move.
KO Potential- None
Description- Wolf shoots forward with one leg extended. Please, for the love of all that is holy, don't use this move.
Wolf Illusion
Uses- Recovery, LolSpiking
Damage- The purple haze does 3%, a good sweetspot does 15%, bad sweetspot does 10%
KO Potential- Mid
Description- Wolf dashes forward at super speed, delivering a shocking blow at the end. If you sweetspot it well in midair, it spikes enemies straight down. But I really recommend not trying to attack with it, the risk outweighs the reward big time.
Reflector
Uses- Reflecting (lol), Countering, Gimping
Damage- 3%
KO Potential- ABSOLUTELY MIND BOGGLING
Description- Wolf activates his reflector, causing a big, red, cat eye like shine to come out. Sure, it sounds mediocre, but it has a special property to it. From the time you press Down + B to the time the move actually comes out on the screen, you are invincible. So its like a step dodge that does damage back. You can also shine spike Fox and Falco out of their Up B's.
3. Advanced Techniques (AT's)
Scarring
Description- Scarring is DI'ing away from a ledge, then illusioning through the stage right away. You can scar on Battlefield, Smashville, Yoshis Island, Norfair, Halberd Ship, Pictochat, and a few others. It gives you another option on how to get back onto the stage, and can also be a surprise attack. Don't use it too often though, it can get predictable and you will get punished.
Semi-Scarring
Description- Semi Scarring is essentially the same thing as scarring, except you dont have to be near the ledge. All you do is start your illusion at the stage, but hold DOWN after you input the illusion. It will cause you to ignore the edge sweetspot and fly right through. Semi Scarring is possible on Final Destination, though it is risky.
Telestepping
Description- This allows you to instantly appear on the edge of the stage. What you do, is drop off a ledge, the jump right up to it, but so you dont sweetspot it. Then, right next to the ledge, do an illusion, it will cause you to pop right onto the stage. Personally, I find this pretty useless.
Boost Smashing
Description- Boost smashing is when you slide way forward while doing your up smash. The input to make it work is (Dash > C stick down > Up + Z). Many other characters can do this, its a great technique for Wolf too.
4. Approaching and Offensive Gameplay
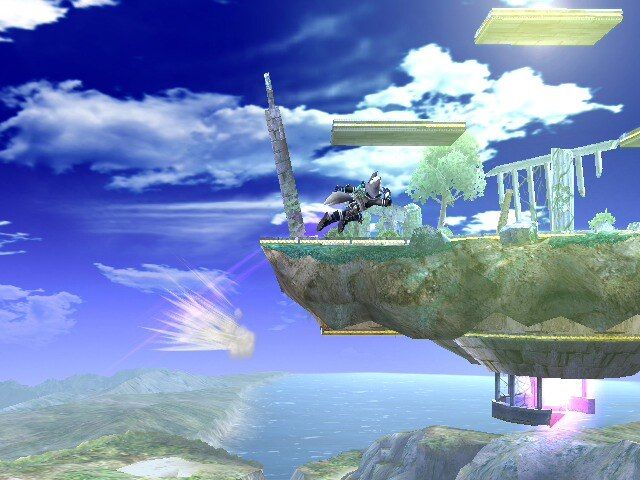
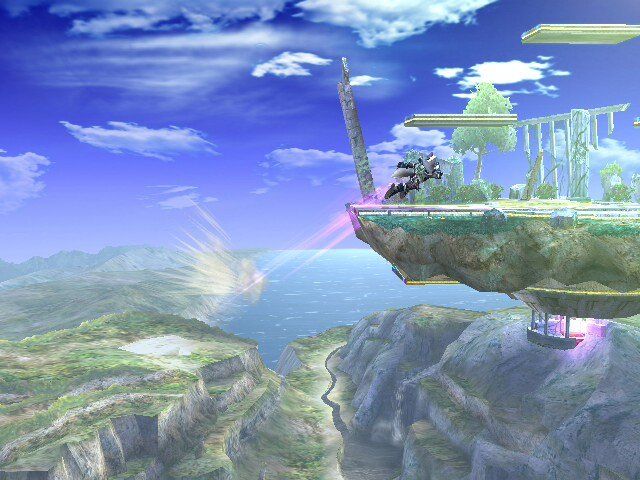
Wolfs strong point is definetly his approaching and offensive style. Your best approach is a Reverse Aerial Rush (RAR) Short hop Fast Fall Bair. You need to jump with X or Y for this to work consistently and effectively. Once you learn how to do it, you will be able to DI forward and back while doing it, so you can space it so just the tip of the bair hits your opponent or your opponents shield. Because of bairs massive range, if you space it properly, the only character in the game who should be able to shield grab you is Olimar. That means you can pressure DDD up close with many bairs on his shield and he wont be able to shield grab you. Thats not to say only attack with bair, Wolf has many other approach options. A properly spaced and DI'd fair cant be shield grabbed either. Because of Wolfs auto cancel aerials on both sides of him, it gives him the ability to actively pressure shields. Mindgaming with boost smash is another good thing about Wolf. Just throw out random auto canceled aerials to psyche your opponent out, then as soon as you land on your auto cancel, quickly boost smash forward. You can also do the same sort of thing with Ftilt, but you need to make sure your opponent is trying to approach after your aerials. However, I do see too many Wolfs approaching with Fire Wolf. Dont. It does 11% and is punishable, bair does 13% and isn't punishable. Also, try not to approach with Nair at all. It's ok for relieving pressure, but dont use it as a main approach. You can also do full jump bairs into double jump bairs, also known as the Wall of Wolf. All it is is creating a "wall" of damage and priority over your opponent so they have a tough time approaching. You can also trying approaching with jab and jab mixups into grabs. At around 50%, you can start tech chasing with down throw, its a great tech chase if they dont tech the first throw. Basically you wanna get strings of bairs going off stage and then juggle them when they try to recover from above. Of course, this wont work on certain characters, like Lucario, but overall it is a good strategy.
5. Defense and Turtle Gameplay.
Because of Wolfs weight, reflector, and blaster, he can survive and still fight back at high percentages. Because of the reflector sending things back twice as fast, a lot of people will not camp against Wolf because of fear of getting all their projectiles back in their face. The only character who can outcamp Wolf is DDD because you cant reflect waddle dees and the waddle dees that are already on the field absorb lasers. Retreating bairs are a must when your playing defensively. It makes it very difficult for the opponent to get in your hit zone to land a kill when your retreating with a lagless, high range attack. Shine is also your best friend when it comes to survival. When your feeling pressured, keep your shine going, shine to jab or shine to dtilt is guarenteed, so keep that in mind in order to get some breathing room in tough situations. You basically want to avoid any laggy attacks when your trying to survive at really high percentages. Basically this part of the guide is just for when you at like, 150% trying to get as much damage as you can on you opponent before they kill you. By no means necassary should you be playing like this at 0%. Attacks you want to avoid when playing like this are Ftilt, Utilt, Fsmash, Usmash, Dair, lagged Fair, Fire Wolf, any laggy attack basically. Stick to laser, shine and bair and dsmash if you are able to get a kill.
Death Chart
The following moves were tested on a level 9 Mario from the center of Final Destination.
AAA- First hit will never kill, second hit will never kill, third hit will kill at 245%
Ftilt- Will kill at 199%
Utilt- Will kill at 130%
Dtilt- Will kill at 259%
Nair- Will kill at 183%
Fair- Will kill at 139%
Dair (Assuming their in a standing position)- Will kill at 181%
Bair- Will kill at 140%
Uair- Will kill at 184%
Full Front Smash- Will kill at 149%
Tipper Front Smash- Will kill at 150%
Upsmash- Will kill at 128%
Down Smash in front- Assuming it's a good hit, 118% (A good hit being, it wasn't too close)
Down Smash Behind- Assuming it's a good hit, 128%
Uthrow- Will kill at 292%
Dthrow- Assuming it kills from the side, not because of lack of recovery, it will kill at 282%
Fthrow - Assuming the trajectory is rainbow, 275%
Fthrow V2- Assuming the trajectory is more horizontal, 229%
Bthrow - Assuming the trajectory is more diagonal, 254%
Bthrow V2- Assuming the trajectory is more vertical, 232%
Dash Attack - Assuming the trajectory is more horizontal, 198%
Dash Attack V2- Assuming the trajectory is more vertical, 191%
Matchups
This part of the guide will go onto explain if Wolf is in an advantageous position or a disadvantageous position against certain characters.
Mario- 50/50 Neutral
Donkey Kong- 55/45 Neutral
Link- 60/40 Advantage
Samus- 60/40 Advantage
Kirby- 45/55 Neutral
Fox- 55/45 Neutral
Pikachu- 45/55 Neutral
Marth- 45/55 Neutral
Mr. Game and Watch- 40/60 Disadvantage
Luigi- 55/45 Neutral
Diddy Kong- 45/55 Neutral
Zelda- 60/40 Disadvantage
Sheik-45/55 Neutral
Pit- 50/50 Neutral
Metaknight- 70/30 Disadvantage
Falco- 45/55 Neutral
Squirtle- 50/50 Neutral
Ivysaur- 60/40 Advantage
Charizard- 60/40 Advantage
Ike- 60/40 Advantage
Snake- 50/50 Neutral
Peach- 40/60 Disadvantage
Yoshi- 60/40 Advantage
Ganondorf- 70/30 Advantage
Ice Climbers- 45/55 Neutral
King DeDeDe- 25/75 Disadvantage
Wolf- 50/50 Neutral
Lucario- 45/55 Neutral
Ness- 55/55 Neutral
Sonic- 60/40 Advantage
Bowser- 55/45 Neutral
Wario- 45/55 Neutral
Toon Link- 55/45 Neutral
R.O.B.- 35/65 Disadvantage
Olimar- 60/40 Advantage
Captain Falcon- 65/35 Advantage
Jigglypuff- 65/35 Advantage
Lucas- 60/40 Advantage
Zero Suit Samus- 55/45 Neutral
Mario- Mario vs Wolf is a very even match. Both are very capable in the air, but Wolf has a slight advantage on the ground. To offset this, Mario can Utilt juggle us at 0 to around 40%. Overall, you never want to be above or behind Mario unless if its over short hop height, you will get combo'd by Uairs and Bairs to hell. Overall, keep him poked with bairs and fairs, try your best to avoid fire balls, and try to keep the fight close and grounded. Jabs, Ftilts and Bairs will wreck Mario, but he can do the same to you with Grabs, Uairs and Bairs. It all comes down to whos better.
DK- Wolf has a slight advantage over DK in the form of laser. He can Utilt us for about 30-40% from 0, his bair makes ours look like ****. His tilts are very anti-approach. So, to offset this, we laser to make him approach. An approaching DK will likely go for SH RAR bairs, so you need to be ready to dodge and punish with our bair, or shield grab it. Alot of DK's will Dtilt twice and then Down B, so thats something to watch out for aswell. Cargo spiking is a pain, so at higher percents, try your best not to get grabbed.
Link- Wolf has a nice advantage on Link. We wreck him in the air and on ground, but he does have annoyances like boomerang and arrows. Basically, once you get in his projectile range, you can destroy him with Fairs and Bairs. Because of Links horrible recovery, often times all it takes is a high percent Dthrow into edge hog for a kill. Also, Dsmash kills much earlier because of his bad recovery. As long as you keep on him and dont give him and chance to break away and spam you, it wont be a hard match.
Samus- Wolf has a really easy time with Samus. She cant camp on account of reflector, but we can. Once you get into her missle and charge shot range, she cant do anything. Zair is basically an annoyance, but once you get too close for her to use it, she cant do anything. Wolf destroys Samus in the air and on the ground, I prefer going in the air with AC Fairs and Bairs myself. A good Samus player will most likely Up-B out of shield when you attack, so just predict and punish.
Kirby- A somewhat difficult match-up for Wolf, mainly because of the Gonzo combo. If you can avoid grabs early on, we can get in Kirbys face with Bairs and Ftilts, I find grabs work well on Kirby too. Your going to have to try harder to hit him with Bairs though, if he crouches, he is extremely low to the ground, making bairs harder to connect with. Kirbys most reliable KO move is Fsmash, so make sure you avoid it, a lot of Kirby players will Dair into Fsmash, but the Fsmash is avoidable, so get your shield up. He'll also go for retreating fairs, so predict and punish with your own fair or bair.
Fox- inb4cantletyoudothatstarfox. Anyway, Wolf can have a hard time with Fox if you dont know what your doing. His dair into utilt combos us to around 45% right away, so avoid dairs. But, Fox has virtually no good answer to our Bair, so, spammmmmm that bair. Also, go for dsmash earlier in this match. Dsmash around 60%, laser him when he's illusioning back to the stage, this forces him to have to Up-B, you jump down, shine his Up B, recover and edgehog for a stock. Its a really hot gimp, it works even better on Falco because you dont need to edgehog in order to kill him. Foxes jab is really good if you dont DI out of it, his main killing move is Upsmash. Just spam bair and get the shinespike gimp as often as possible, it shouldn't be too difficult.
Falco- Falco used to be considered Wolfs hardest matchup. The basic strategy of this match is as follows. Spam laser at start nonstop. Roll away, spam more. Eventually, he'll start reflecting the lasers back at you. Eat those lasers up until you around 35-40%. Now he cant chain spike. Proceed to space **** him with bairs. Once hes around 50-70%, dsmash near the edge. Falco will then illusion to recover, we laser him so he falls and is forced to use Up B. You jump down, shine spike. GG Falco.
And for now, that concludes my guide. Appologies for how long it took me to finally rewrite it, but I will try my very best to keep it updated. On that note, everyday I will write 3 more matchups, giving advice as I see how the match should be played.
Koskinator
GANON 4 LIFE